Wednesday, 25 June 2014

Apple Crumble Muffins

WARNING: The recipe you are about to read is extremely delicious. Also, these muffins are beyond addicting. There is nothing "clean" or healthy about them, but they are SO GOOD I couldn't resist sharing them with you! They are best served fresh out of the oven with some cinnamon coffee but they are also delicious warmed up in the micro for about 20 seconds a couple days later.

Either way...these are to DIE for!


Apple Crumble Muffins

Ingredients:
For the Crumble Topping:
1/3 cup light brown sugar
1 tbsp granulated sugar
1 tsp ground cinnamon
1/4 cup unsalted butter, melted
2/3 cup all purpose flour

For the muffins:
1/2 cup butter, room temp
1/2 cup light brown sugar 
1/4 cup granulated sugar
2 large eggs
1/2 cup sour cream (or yogurt)
2 tsp vanilla extract
1 & 3/4 cup all purpose flour
1 tsp baking soda
1 tsp baking powder
1 tsp ground cinnamon
1/2 tsp salt
1/4 cup milk
1 & 1/2 cups peeled and chopped apples (I used Granny Smith)

Method:
First, we make the crumb topping: in a small bowl, whisk together the brown sugar, white sugar, cinnamon and melted butter. Add in the flour and "chop" in with a spatula. You want the topping to be thick and crumbly. I found I needed to add a bit more flour to achieve this consistency. Set aside.  
Preheat oven to 425 degrees F. Line 2 muffin tins with 14 liners. 

Next, the muffins!: In the bowl of a stand mixer with the paddle attachement (or in a medium bowl with a hand mixer) beat the butter until it is nice a fluffy (about 1 minute). Add the sugars and beat for another 2 minutes or until fully creamed together. Scrape down the sides of bowl and bottom a couple times just to make sure everything is fully integrated. 

Add the eggs, sour cream and vanilla and beat on high speed for about 2 minutes or until everything is combined evenly. Again, make sure to scrape down the sides of the bowl and the bottom of the bowl a couple times.

In a large bowl, using a wooden spoon, stir together the flour, baking soda, baking powder, cinnamon and salt.  Add the wet ingredients to the dry and mix together with a whisk. Add the milk and gently combine with the whisk. Fold in the apples with a wooden spoon. 

Spoon the batter between the 14 liners, filling them almost all the way to the top. Press a generous amount of the crumb topping on each. Don't be shy with this, this is one of my favorite parts of the muffin!

Bake for 5 minutes at 425 then reduce the heat to 350 and bake for about 18-20 minutes, watching them after the 18 minute mark. I took mine out a little early, but if you want a really dark golden crumbly top, leave in for the 20 minutes. 

Remove and let cool in the pan for about 5 minutes then transfer to a wire rack. Truth be told, we ate one RIGHT away and it was sooooooooo good. 


Enjoy!

- Lisa

Monday, 23 June 2014

8 Tips to Having a Great Run, Every Run

I have a very strange relationship with running. There are runs that I absolutely LOVE. When I'm done, I feel like a rock star. These runs happen about 60% of the time. The rest of the time...I'm miserable. About 5 minutes into the run, I want to give up and I've convinced myself my calves are going to break. I'm tired, I'm sweaty and kinda grumpy. That's also if I've even gotten out the door. For about 1 year now, I simply haven't run because I can't get past the anxiety in my head!

So...if you want to run, or if you are like me and love running, but have some weird hang ups with it, here are the tricks I've been using to get out of my head and back into running [note: this tricks can really be used for getting yourself out the door for any form of exercise].

Sometimes the hardest part of running is just getting out the door. I'm sure you have 100 reasons why you can't go for a run today. Either you're "too tired" or "don't have enough time" or "I'll go tomorrow" whatever it is, there will ALWAYS be a reason.

TIP 1: No matter what, just put on your workout gear and get out the door. I'll often trick myself into going out by saying "OK, even if I only go for 5 minutes, I at least got out" Give yourself an out so the whole task doesn't seem as daunting.

Ok, so now you're out the door. AWESOME! Time to start...

TIP 2: Have a playlist of music that is going to pump you up. I like to listen to cheesy dance music from the 80's because I can sing along and it makes me smile. I also have some great "kick ass" songs that I go to if I need a boost like "Work B*tch" by Britney Spears. Whatever it is that gets you going...put that on and start jogging

I find that when I run with people for the first time, they start off like a shot and about 5 minutes in, they are spent. They get frustrated and are upset that they have to stop and walk.

TIP 3: Start SLOWLY. If you feel yourself running out of breath quickly, you're probably going too fast. Drop your pace down. You may feel like you are walk/jogging but that's ok! You want to go at a pace that you could hold a light conversation at.

TIP 4: Pay attention to your breathing! You want your breathing to be calm and not rushed/hurried. If you find yourself REALLY panting, SLOW DOWN. I find a very useful trick to regulate my breathing is: Breath in for 4 steps, breath out for 4 steps. This gets your brain re-focused and better breathing makes for a better run.

Okay, at this point, you're probably doing OK, but your legs are tired and you're kind of bored. At this point, your head will start trying to trick you and go "Lets just walk. Your legs are really tired and your sort of out of breath. Just walk"

TIP 5: Unless you are going to pass out or you have a sharp, stabbing pain...DON'T STOP. This is alllllll in your head. When I get to this point in a run, I go "ok, I'm going to get to that tree up there and then I'll stop" and then I get to the tree and realize I'm ok so I'll pick another tree down the way and jog to that and so on and so forth. This keeps your brain occupied and off of the discomfort you are feeling in your legs (which is completely normal) and keeps YOU motivated.

In the same vein...

TIP 6: Try not to think about how much longer you have to run. Whether you're running for a period of time or for a specific KM, don't think about how much further you have to go until you're done...think about that next tree, that next stop light. If you think about how much further you have to go, you'll overwhelm yourself and this can be quite discouraging. Literally take your run, ONE STEP at a time.

Listen, sometime, you need to walk & that is TOTALLY OK. Sometimes, you'll hit a wall and you literally cannot continue running. That's totally normal too. The idea with these tips is not to force yourself to run NO MATTER WHAT, but are more meant to help you keep your motivation going and keep yourself in the moment and out of your head.

Two more tips that are KEY to any exercise, running or otherwise.

TIP 7: Stretch! When you're done, it is SO important to stretch. There are hundreds of great stretching resources out there for runners, so take the extra 5 minutes and stretch it out. I know if I don't stretch after a run my legs are NOT happy with me the next time I head out.

TIP 8: HYDRATE. Drink lots of water both before and after your run, especially if you are running in hot summer months. Your body needs fluids to function and your run will be greatly affected if you are dehydrated.


Running can be really hard, but with these tips, I've found my running experience to improve and I feel really good after almost all of my runs.

What are you tips/tricks for getting a great run in?


Friday, 20 June 2014

This Little Trick Will Change Your Morning Coffee

I love coffee. In fact, I love coffee a lot, probably more than I should. I need it to start my day, keep me going in the midday and if I could (and it wouldn't keep me awake at night) I would drink it after dinner.

A while back I discovered somewhere (I think I read it online, or maybe I remember it from a Sex and the City episode) to add cinnamon to your coffee. So I started doing it, thinking "yea, ok, what is this really going to do?"

FACT: It is awesome! It adds a certain (but very subtle) woodiness flavour to your coffee and it smells AH-MAZING. The change to your morning is two-fold: The aroma is calming and delicious and the taste is different, but not so much that it will throw the balance of your coffee off. This is the only way I make my coffee at home now, I highly recommend it!

HOW TO:

1. Put your grounds in to your coffee maker as per normal
2. Sprinkle cinnamon on top of the grounds - this insures the cinnamon is blended into the flavour
3. Brew as normal - I like to set mine up to brew before I wake up, so the scent wafts up to my bedroom and I can smell is as I wake up :)
4. Add milk & sugar (or nothing at all) to your coffee as normal & enjoy!

Let me know if you try this out & what you think! I promise, it is worth it!

Tuesday, 17 June 2014

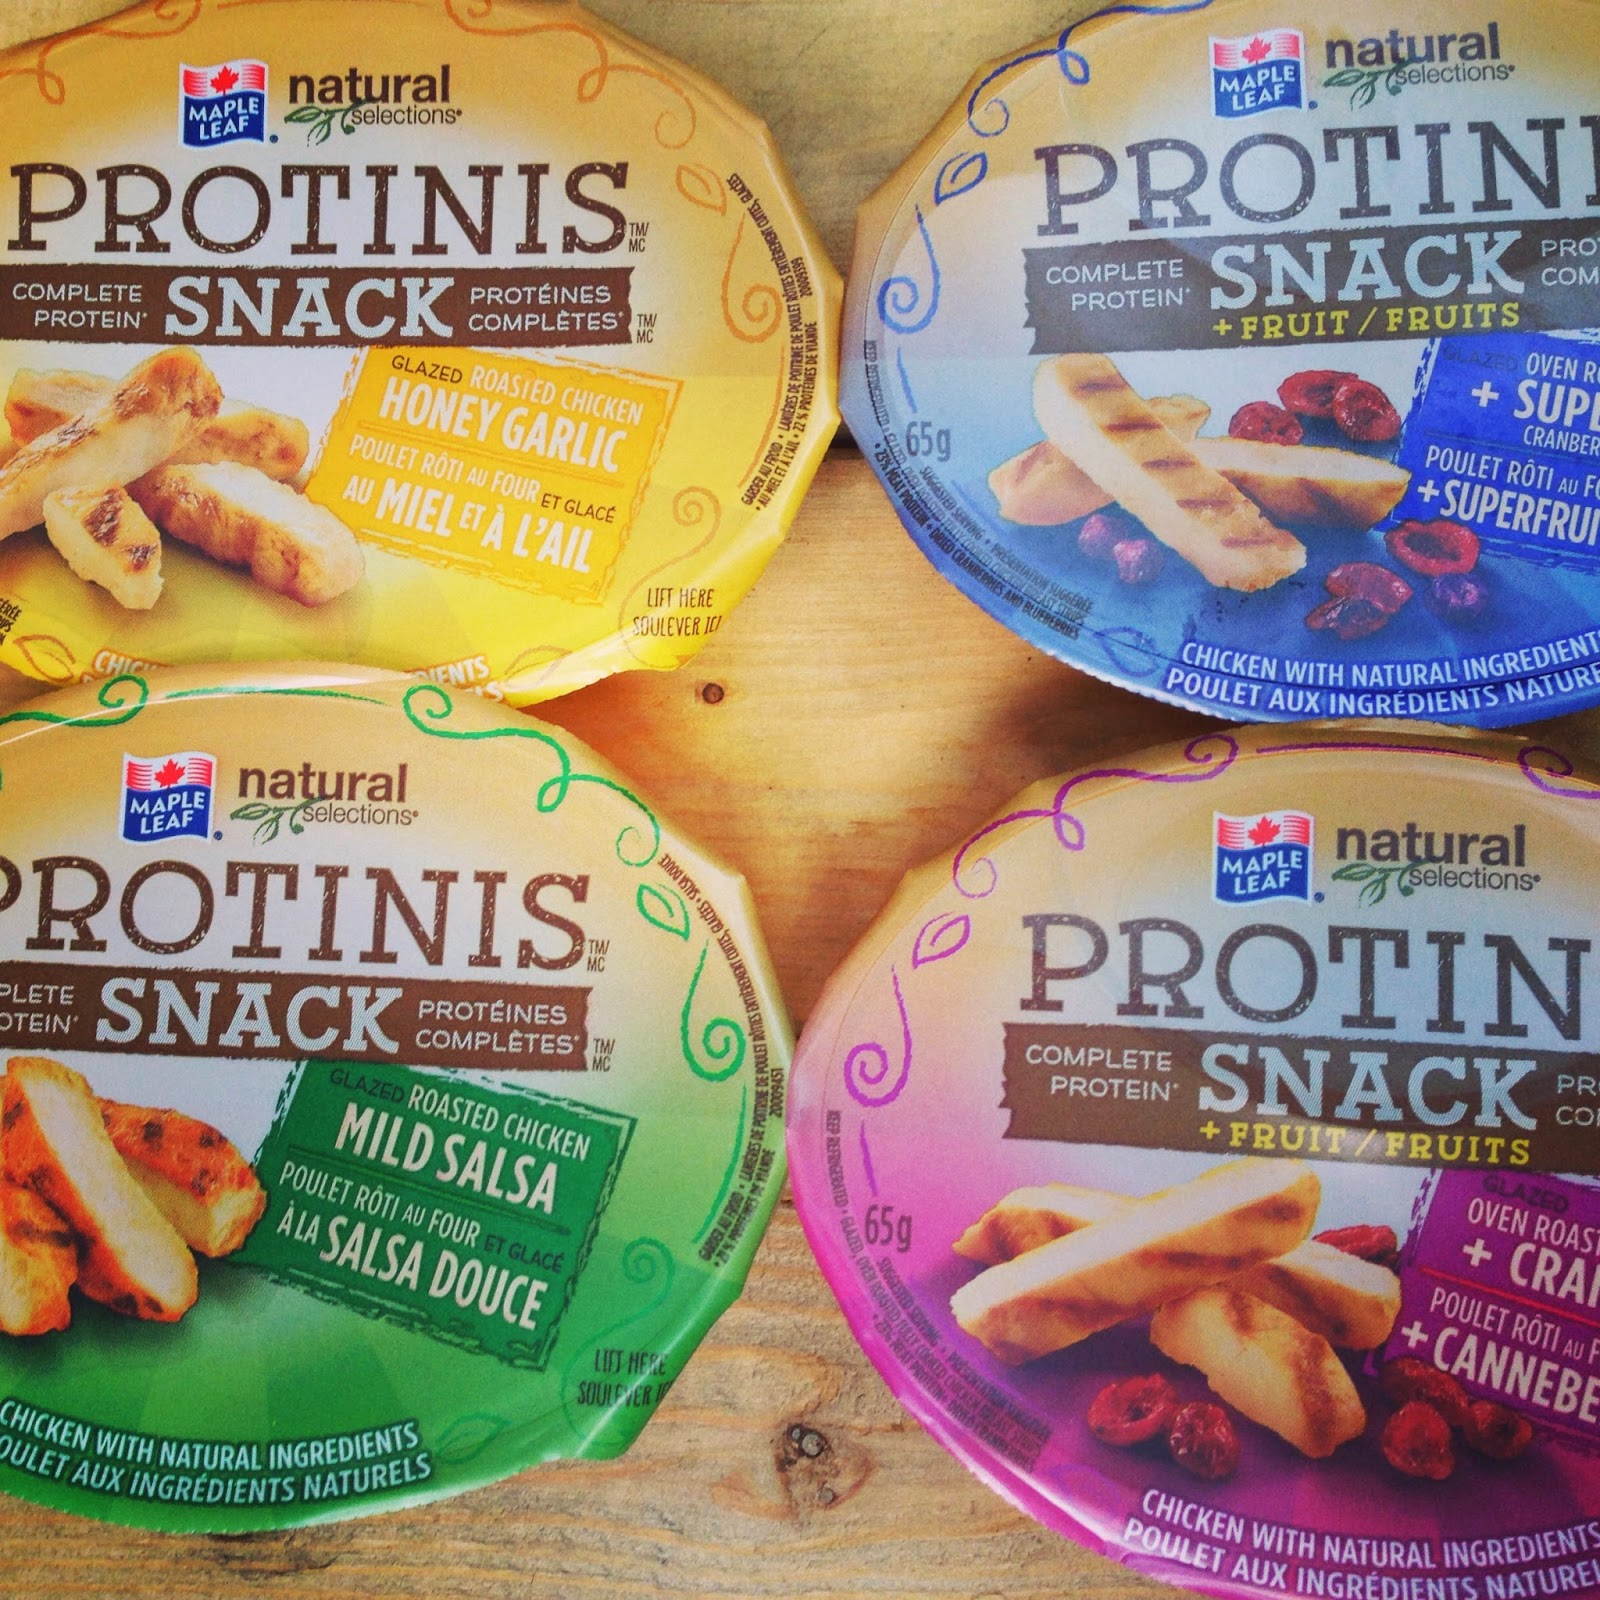
Awesome Snacking with PROTINIS(TM) {Sponsored Post}

As you may or may not know, I love food. I also love eating...all the time. However, I find it hard to get GOOD snacks into my day at work or after a workout. Usually I'll reach for fruit or something a little less healthy (*cough* chips) which never quite hits the spot. Enter Maple Leaf® Natural Selections® PROTINIS™ (like Martinis, but PRO). 

PROTINIS™ are made with oven roasted chicken & dried fruit to make up a snack that is complete source of protein. As you may or may not know, protein is pretty important stuff. Not only does it provide you with essential amino acids that your body cannot produce on its own it also helps your muscles rebuild after a workout. Complete protein also helps keep you fuller, longer. That means the more satiated you are, the less like you are to binge snack on unhealthy options. 

SUPER LOVE these ones!
 All of that aside, here is what I really like about PROTINIS™ - there are EIGHT different flavours to choose from...some a sweet (like Sweet Thai Chili & Honey Garlic) and others are savoury (Mild Salsa) and others come with a side of fruit (Oven Roasted Chicken and Cranberry, Oven Roasted Chicken and Superfruit, Oven Roasted Chicken and Mango, and Oven Roasted Chicken and Apple). This means, no matter what snack-y frame of mind you are in, there is a flavour that will satisfy that craving! You can snack on them straight out of the package, or you can add them to your salad. 

I think this commercial sums PROTINIS up perfectly:


Hey, you don't have to take my word for it, either! The LOVELY folks at Maple Leaf Foods® have given me coupons to send to 6 of you! All you have to do is fill out the Rafflecopter below! 

Chicken & Cranberry
 For more great tips & recipes, check out their Facebook & Twitter pages...they always have great foodie inspiration and they always tweet & comment back (which goes MILES for me)!   

a Rafflecopter giveaway
{This is a sponsored post. However, all opinions are my own. As you know, I would never share anything with you unless I love the product and think that you will too!}

Tuesday, 10 June 2014

Flourless Chocolate Peanut Butter Mini Blender Muffins

I really, really, really love Pinterest. Aside from the abundance of food porn & amazing crafts, I've also found many a fascinating tips and tricks. In fact, most of the baking tricks I know, I've learned from recipes I've found on Pinterest. Case in point...these AMAZING Blender Muffins!

I can honestly say, I've never, EVER considered mixing something up for baking in a blender. Maybe that's because my blender is absolute crap or maybe because my brain doesn't think outside the "bowl" (see what I did there? Like "outside the box" but BOWL, because, well, you get it). Either way, this way of preparing is amazing. Little to no mess, everything is contained and it makes for a very rich and velvety texture.

These mini muffins are amazing. There is NO refined flour, sugar, butter (the banana acts as the butter) or any dairy for that matter. That means they are gluten & dairy free. The best part? They taste like the most decadent dessert. They are actually so rich, you'll probably only need to eat just one to satisfy your chocolate craving (whether at breakfast or after dinner). Also, I love that no special ingredients are required...you'll probably have everything you need, already at home!

I highly recommend you try out this recipe!


[On a side note, I've started training for my next half marathon (Scotiabank Toronto Waterfront Marathon) that takes place on October! I'll be posting about my training over the next coming months so if you have any questions about it, shoot me an email (runningtobake@gmail.com), I'd love to answer it in my upcoming posts!]

Flourless Chocolate Peanut Butter Mini Blender Muffins

makes about 16 mini muffins
Ingredients:
1 medium/large ripe banana, peeled
1 large egg
1/2 cup heaping with creamy peanut butter (best to go with regular peanut butter, not natural for this one)
1/3 cup cocoa powder
3 tbsp honey (maple syrup would work as well)
1 tbsp vanilla extract
1/4 tsp baking soda
pinch of salt
1/2 cup semi-sweet chocolate chips + more for sprinkling 

Method:
Preheat oven to 400 degrees F. Spray 2 mini muffin pans with non-stick spray or line with mini muffin wrappers. 
In a blender (or food processor, or with a hand blender) combine banana, egg, peanut butter, cocoa powder, honey, vanilla, baking soda and salt and blend until creamy and smooth. Takes about 1 minute or so. Since my blender is not the best, I had to stop and mix with a wooden spoon once or twice to make sure everything combined properly. 

Remove blender from stand and stir in the 1/2 cup of chocolate chips with a wooden spoon. Mini ones would probably work best, but I only had regular size on hand and they were fine.

Using a tablespoon, spoon mixture into muffin tins, filling up about 3/4 of the way. Sprinkle a few chocolate chips on top of the muffins and press in lightly with your finger tips. 

Put in oven and bake for 8-12 minutes. The baking time really depends on your oven, the ripeness of the banana and size of the tins (I have 2 different sizes of "mini" muffin tins). Mine took about 12 minutes to cook, just make sure you watch them. They're ready when the tops are springy to the touch and a tooth pick is inserted and comes out clean. 

Allow to cool in the tins for 15 minutes (if you can!) then transfer to a wire rack. You may need to loosen the edges with a knife in order for them to pop out cleanly. 

Store up to 5 days in an airtight container or 6 months in the freezer (HA! Like they'll last that long). 


Enjoy! These are truly delicious!