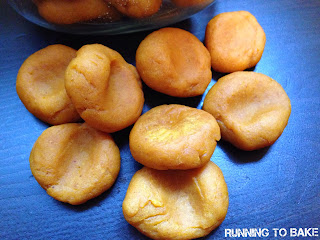
We've moved! Get the full recipe HERE!
Enjoy!
Lisa
Showing posts with label baking. Show all posts
Wednesday, 6 August 2014
Wednesday, 23 July 2014
Cake Batter Cinnamon Rolls + Glaze
So, I have this weird fear of working with dough. More specifically, any dough that needs time to rise. I'm always worried - what if I don't leave it for long enough, too long, what if the water is too hot, not hot enough, etc. etc. Plus, it takes a lot of time & I'm not exactly patient (nor is my taste tester), so I typically don't try dessert recipes that require rising or really any waiting time.
Until I saw these "Cake Batter Cinnamon Rolls" on Pinterest. I simply couldn't pass by these beautiful looking things without taking a closer look. I even couldn't resist them when I saw how much time they took. Plus, I haven't done much baking recently, so I decided to go all out. Hashtag Yolo...or whatever.
Man, these things are GOOOOOOOD. I'll have to admit, I don't really get a "cake batter" vibe from them, but even still, they are worth every second spent on them.You also MUST make the glaze. It takes them from "This are really good" to "AJNFKSJN!##!(U@!!!!!!!"
Be warned - these take time, so this is not a good last minute dessert to whip up before a BBQ (as I may or may not have tried to do). Also, it's a little bit tedious working with the dough, rolling it up and cutting it, but after a couple tries, you'll be a pro!
Until I saw these "Cake Batter Cinnamon Rolls" on Pinterest. I simply couldn't pass by these beautiful looking things without taking a closer look. I even couldn't resist them when I saw how much time they took. Plus, I haven't done much baking recently, so I decided to go all out. Hashtag Yolo...or whatever.
Man, these things are GOOOOOOOD. I'll have to admit, I don't really get a "cake batter" vibe from them, but even still, they are worth every second spent on them.You also MUST make the glaze. It takes them from "This are really good" to "AJNFKSJN!##!(U@!!!!!!!"
Be warned - these take time, so this is not a good last minute dessert to whip up before a BBQ (as I may or may not have tried to do). Also, it's a little bit tedious working with the dough, rolling it up and cutting it, but after a couple tries, you'll be a pro!
Cake Batter Cinnamon Rolls + Glaze
Ingredients:
For the dough:
1 cup milk (any)
2/3 cup white sugar
1 & 1/2 tbsp active yeast (2 packets)
1/2 cup butter, room temp
2 large eggs
1/2 tsp salt
4 & 1/2 cups all-purpose flour (plus some for dusting/rolling)
For the filling:
1/2 cup sugar
3/4 cup all-purpose flour
2 tbsp dry milk powder (any will do)
1/4 tsp salt
1/4 cup butter, cold & cut into 4 pieces
1 tsp vanilla
1/2 cup sprinkles
6 tbsp melted butter
1 tbsp ground cinnamon
For the glaze:
1 cup icing sugar
3 tbsp heavy cream (or milk)
1 tsp vanilla
Method:
First, we make the dough. In a small saucepan, warm the milk over low heat until it is lukewarm (make sure not to scald the milk, that will cause problems with the yeast). Pour the warm milk into the bowl of a stand mixer. Manually stir in the white sugar and yeast. Cover with a towel and let sit for about 5 minutes (or until the mixture is nice and foamy). Manually stir in the butter and eggs with a whisk. Attach the dough hook and set to medium speed while you slowly add the flour. Once all added, scrape down the sides and turn to medium high speed. Let the mixer knead for about 6 minutes.
Transfer dough to a floured surface and knead with your hands for about 2 minutes. Form into a ball and set in a lightly greased bowl. Cover and let rise for 1 - 2 hours or until doubled in size.
Line the bottom of a 9 x 13 inch baking pan with parchment paper making sure there is extra at the ends. Place dough on a lightly floured surface and roll out to 10 x 24 inch rectangle. It is important that the dough has even thickness and is nice and smooth.
Now we make the filling. In a food processor, combine sugar, flour, milk powder and salt. Process for 10 seconds. Add the butter and chop for another 10 seconds. Add vanilla and process again until the mixture is crumbly. Transfer to a small bowl and stir in the sprinkles.
Using a pastry brush, brush the melted butter over the dough and sprinkle cinnamon over top. Sprinkle 3/4 of the filling you just made over top (there will be some left, head over to Sally's blog to check out how to use the leftovers).
Tightly roll up the dough to form a 24 inch log. Using a sharp knife, slice the rolls into about 1.5" pieces (will make about 15 rolls) and place in your prepared pan, filling side up. Cover with a towel and let rise for about 2 hours (or even overnight if you want to make them for breakfast!)
Preheat oven to 400 degrees F. Cover rolls with tinfoil and bake for about 25 minutes or until golden brown. Transfer your pan to a cooling rack and let sit for 15 minutes.
To make the glaze - whisk together the icing sugar, milk and vanilla. Add milk or icing sugar to reach your desired texture. Drizzle over buns and serve warm!
Store unglazed buns in an airtight container for up to a week in the fridge. Microwave for 30 seconds and add glaze before serving.
Enjoy!
Lisa
Wednesday, 25 June 2014
Apple Crumble Muffins
Either way...these are to DIE for!
Apple Crumble Muffins
Ingredients:
For the Crumble Topping:
1/3 cup light brown sugar
1 tbsp granulated sugar
1 tsp ground cinnamon
1/4 cup unsalted butter, melted
2/3 cup all purpose flour
For the muffins:
1/2 cup butter, room temp
1/2 cup light brown sugar
1/4 cup granulated sugar
2 large eggs
1/2 cup sour cream (or yogurt)
2 tsp vanilla extract
1 & 3/4 cup all purpose flour
1 tsp baking soda
1 tsp baking powder
1 tsp ground cinnamon
1/2 tsp salt
1/4 cup milk
1 & 1/2 cups peeled and chopped apples (I used Granny Smith)
Method:
First, we make the crumb topping: in a small bowl, whisk together the brown sugar, white sugar, cinnamon and melted butter. Add in the flour and "chop" in with a spatula. You want the topping to be thick and crumbly. I found I needed to add a bit more flour to achieve this consistency. Set aside.
Preheat oven to 425 degrees F. Line 2 muffin tins with 14 liners.
Next, the muffins!: In the bowl of a stand mixer with the paddle attachement (or in a medium bowl with a hand mixer) beat the butter until it is nice a fluffy (about 1 minute). Add the sugars and beat for another 2 minutes or until fully creamed together. Scrape down the sides of bowl and bottom a couple times just to make sure everything is fully integrated.
Add the eggs, sour cream and vanilla and beat on high speed for about 2 minutes or until everything is combined evenly. Again, make sure to scrape down the sides of the bowl and the bottom of the bowl a couple times.
In a large bowl, using a wooden spoon, stir together the flour, baking soda, baking powder, cinnamon and salt. Add the wet ingredients to the dry and mix together with a whisk. Add the milk and gently combine with the whisk. Fold in the apples with a wooden spoon.
Spoon the batter between the 14 liners, filling them almost all the way to the top. Press a generous amount of the crumb topping on each. Don't be shy with this, this is one of my favorite parts of the muffin!
Bake for 5 minutes at 425 then reduce the heat to 350 and bake for about 18-20 minutes, watching them after the 18 minute mark. I took mine out a little early, but if you want a really dark golden crumbly top, leave in for the 20 minutes.
Remove and let cool in the pan for about 5 minutes then transfer to a wire rack. Truth be told, we ate one RIGHT away and it was sooooooooo good.
Enjoy!
- Lisa
Labels:
apple,
apple crumble,
baked,
baked goods,
baking,
breakfast,
crumble,
muffins,
oven fresh,
snacks
Tuesday, 10 June 2014
Flourless Chocolate Peanut Butter Mini Blender Muffins
I really, really, really love Pinterest. Aside from the abundance of food porn & amazing crafts, I've also found many a fascinating tips and tricks. In fact, most of the baking tricks I know, I've learned from recipes I've found on Pinterest. Case in point...these AMAZING Blender Muffins!
I can honestly say, I've never, EVER considered mixing something up for baking in a blender. Maybe that's because my blender is absolute crap or maybe because my brain doesn't think outside the "bowl" (see what I did there? Like "outside the box" but BOWL, because, well, you get it). Either way, this way of preparing is amazing. Little to no mess, everything is contained and it makes for a very rich and velvety texture.
These mini muffins are amazing. There is NO refined flour, sugar, butter (the banana acts as the butter) or any dairy for that matter. That means they are gluten & dairy free. The best part? They taste like the most decadent dessert. They are actually so rich, you'll probably only need to eat just one to satisfy your chocolate craving (whether at breakfast or after dinner). Also, I love that no special ingredients are required...you'll probably have everything you need, already at home!
I highly recommend you try out this recipe!
[On a side note, I've started training for my next half marathon (Scotiabank Toronto Waterfront Marathon) that takes place on October! I'll be posting about my training over the next coming months so if you have any questions about it, shoot me an email (runningtobake@gmail.com), I'd love to answer it in my upcoming posts!]
I can honestly say, I've never, EVER considered mixing something up for baking in a blender. Maybe that's because my blender is absolute crap or maybe because my brain doesn't think outside the "bowl" (see what I did there? Like "outside the box" but BOWL, because, well, you get it). Either way, this way of preparing is amazing. Little to no mess, everything is contained and it makes for a very rich and velvety texture.
These mini muffins are amazing. There is NO refined flour, sugar, butter (the banana acts as the butter) or any dairy for that matter. That means they are gluten & dairy free. The best part? They taste like the most decadent dessert. They are actually so rich, you'll probably only need to eat just one to satisfy your chocolate craving (whether at breakfast or after dinner). Also, I love that no special ingredients are required...you'll probably have everything you need, already at home!
I highly recommend you try out this recipe!
[On a side note, I've started training for my next half marathon (Scotiabank Toronto Waterfront Marathon) that takes place on October! I'll be posting about my training over the next coming months so if you have any questions about it, shoot me an email (runningtobake@gmail.com), I'd love to answer it in my upcoming posts!]
Flourless Chocolate Peanut Butter Mini Blender Muffins
from Averie Cooks
makes about 16 mini muffins
Ingredients:
1 medium/large ripe banana, peeled
1 large egg
1/2 cup heaping with creamy peanut butter (best to go with regular peanut butter, not natural for this one)
1/3 cup cocoa powder
3 tbsp honey (maple syrup would work as well)
1 tbsp vanilla extract
1/4 tsp baking soda
pinch of salt
1/2 cup semi-sweet chocolate chips + more for sprinkling
Method:
Preheat oven to 400 degrees F. Spray 2 mini muffin pans with non-stick spray or line with mini muffin wrappers.
In a blender (or food processor, or with a hand blender) combine banana, egg, peanut butter, cocoa powder, honey, vanilla, baking soda and salt and blend until creamy and smooth. Takes about 1 minute or so. Since my blender is not the best, I had to stop and mix with a wooden spoon once or twice to make sure everything combined properly.
Remove blender from stand and stir in the 1/2 cup of chocolate chips with a wooden spoon. Mini ones would probably work best, but I only had regular size on hand and they were fine.
Using a tablespoon, spoon mixture into muffin tins, filling up about 3/4 of the way. Sprinkle a few chocolate chips on top of the muffins and press in lightly with your finger tips.
Put in oven and bake for 8-12 minutes. The baking time really depends on your oven, the ripeness of the banana and size of the tins (I have 2 different sizes of "mini" muffin tins). Mine took about 12 minutes to cook, just make sure you watch them. They're ready when the tops are springy to the touch and a tooth pick is inserted and comes out clean.
Allow to cool in the tins for 15 minutes (if you can!) then transfer to a wire rack. You may need to loosen the edges with a knife in order for them to pop out cleanly.
Store up to 5 days in an airtight container or 6 months in the freezer (HA! Like they'll last that long).
Enjoy! These are truly delicious!
Monday, 7 October 2013
Soft Peanut Butter Pumpkin Puppy Treats
Labels:
baking,
dog,
dog treats,
fall,
peanut butter,
pumpkin,
puppy,
puppy treats
Subscribe to:
Posts (Atom)