Thursday 31 October 2013

Pumpkin Chocolate Chip Cookies

First...


Quite frankly, I'm glad Halloween is finally here. I kind of forgot about it until this morning and I realized we had to get dressed up for work *sigh* I'm not a huge Halloween fan, as I've established before so I'm excited because tomorrow I can finally start my Holiday Baking Series!!

Before I do that though, I have ONE more Fall Baking Post for you! Given that I'm not a HUGE pumpkin fan, I was reluctant about these, but they are quite good. I brought them up to a family gathering with hubby's fam awhile back and they were GONE in about 10 minutes.


Pumpkin Chocolate Chip Cookies

Ingredients:
3 cups all purpose flour
3/4 tsp salt
1/2 tsp baking powder
2 & 1/2 tsp of Pumpkin Spice
1 cup butter at room temp
3/4 cup brown sugar
1 cup granulated sugar
1 large egg
2 tsp vanilla extract
1 cup pumpkin puree
2 cups chocolate chips (I used milk chocolate)

Method:
Preheat your oven to 350 degrees F and line a baking sheet with parchment paper.

In a medium bowl, whisk together the flour, salt, baking powder and pumpkin spice and set aside.

In a mixer, cream together the butter and the sugar until nice and fluffy (about 3-4 mins). Add the vanilla, egg and pumpkin and continue to mix until all combined. Slowly add the dry ingredients until everything is JUST combined. Using a wooden spoon, stir in the chocolate chips.

Using a cookie scoop (or tablespoon, which is what I have) drop rounded batter onto the baking sheet. Put in the oven for about 10 mins or until they are golden brown around the edges. 

When they are done, let them cool on the pan for a couple mins, then transfer to a wire rack. 

Mmmmm pumpkin. Please ignore my ugly hands, clearly I'm a nail bitter.

Happy Halloween!!!!

Monday 28 October 2013

Apple & Banana Kitchen Sink Bread

Okay, I have a confession. I'm really just biding my time with these Fall themed recipes. I absolutely cannot WAIT to start Christmas Baking. I KNOW, I KNOW, everyone hates Christmas but...

There is just SOMETHING about the whole holiday that I love. The snow, the specialty coffees, the anticipation in the air, the music and most importantly...THE FOOD. Eggnog this, peppermint that...it's just the best.

That all being said, I have a 2 more Fall Baking posts to share with you.

This one is of my own imagination. Basically, I only had 2 ripe bananas and 1 apple to work with, and a brand new loaf pan, so I decided to turn them into something. I also had a little bit left of everything else in this recipe, hence the "Kitchen Sink." If you're nut-free, you can omit the nuts and the bread will still be super yummy!


Apple & Banana Kitchen Sink Bread
basic banana bread recipe from simplyrecipes.com
Ingredients:
2 ripe bananas, mashed
1 medium apple chopped up into small piece
1/3 cup melted butter
1 cup brown sugar
1 egg, beaten
1 tsp vanilla
1 tsp baking soda
pinch of salt
1 1/2 cups all purpose flour
1/2 cup milk chocolate chips
1/4 cup slivered almonds
1/4 cup chopped pecans

Method:

Preheat your oven to 350 degrees F.

With a wooden spoon, combine the melted butter with your mashed bananas and chopped apples in a large mixing bowl. Next, mix in the sugar, egg and vanilla. Sprinkle the salt and baking soda over the mixture and incorporate. Add the flour and combine completely until a nice dough forms. FINALLY, add the kitchen sink (everything else) and mix until everything is evenly distributed.

Pour batter into a 8" loaf pan (mine was a 9" so the bread came out a little thinner) and bake for 1 hour or until you can insert a tooth pick and it comes out cleanly.

Let cool on a rack. Since we don't wait until anything is cool, we cut into it right away :)

This bread is especially good with a coffee or tea in the morning :) Enjoy!

Wednesday 23 October 2013

Apple Cinnamon Scones

I have a confession. Although my blog is called "Running to Bake" I've been SERIOUSLY lacking on the running side of things. For awhile I made a whole host of excuses as to why I haven't been running. I've been too busy, or it's been raining, or I feel guilty if I don't bring the dogs, blah, blah, blah. Then, I started to become afraid of it again. I would put it off, and assume that I'd get back to it eventually. But I didn't.

I started getting depressed. Work has been really insane recently, I haven't been sleeping and even though I was doing Zumba, I was teaching, so it's not really the same brain break I've been craving.

Finally, the other day, I made a deal with myself. I would go out, even for 5 mins and see how it feels. In my heart of hearts I knew I needed to, but that anxious part of myself was terrified.

So I went. For 25 mins...and it felt f*cking awesome. My legs and lungs burned, but every time I tried to slow down, my legs kept pumping me forward. I felt like a puppy whose been cooped up in the house for too long. By the end of the run, I was panting, smiling and even crying. It felt so good.

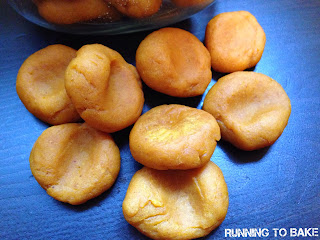
When I got home, I was so inspired & excited, I HAD to make something (after all, this IS Running to Bake). I made myself a BIG ol' batch of homemade chips (hubby had some too, ok??) and prepared these apple scones to pop into the oven the next morning.

Let me tell you, there is noting quite like the smell of baking and coffee in the morning to pull you out of a funk. Oh yea...this face helped too:

I've never made scones before I tried this recipe, so I wouldn't say they were perfect, but they sure did taste delish with coffee and a little butter on them (peanut butter would have been good too!)

This is also my SECOND last post in my fall baking series. I'm kind of excited because I'm tired of pumpkin everything and I CAN'T WAIT TO START HOLIDAY BAKING!!!!!! IT'S MY FAVE TIME OF YEAR! AJDSNFDNVLDKVNLDKVNLKN!!!!!!!!!!!!!!

Ahem.

Apple Cinnamon Scones
adapted from King Arthur Flour

Ingredients:
2 & 3/4 cups all purpose flour
1/3 cup granulated sugar
3/4 tsp salt
1 tbsp baking powder
1 tsp Apple Pie Spice or cinnamon
1/2 cup cold butter (I used unsalted)
3/4 cup apple, peeled & cut into 1/2" pieces (I used granny smith apples)
3/4 cup cinnamon chips (optional, I didn't use them)
2 large eggs
1tsp vanilla extract
1/2 cup unsweetened apple sauce

Topping
3 tbsp sugar (coarse works best, but granulated is fine too)
1/2 tsp ground cinnamon

Method:

In a large mixing bowl, whisk the flour, sugar, salt, baking powder and apple pie spice. Using a knife (or your hands) work in the butter until everything is crumbly and uneven. I don't really know what this means, but I cut the butter into chunks and then mixed it in with the flour with my hands. Stir in the chopped apples and the cinnamon chips (if using). 

In a separate bowl, whisk together the eggs, vanilla and apple sauce. When combined, add to the the dry ingredients and stir together until dough is moistened and stays together.

Line a baking sheet with parchment paper and sprinkle flour on top (this stuff is STICKY!)

Place dough on the baking sheet and divide in half. Pat and round each half so that it is about 5" in diameter and 3/4" thick. I didn't do that, obviously, I just kind of eye-balled it, but if you want to measure, by all means, go for it!

Next, to make the topping. In a small bowl combine the sugar and cinnamon. Coarse sugar would be best for this, but I only have the granulated stuff. Using a pastry brush, brush both mounds with milk and generously sprinkle the sugar/cinnamon mixture on top. The more the better as the scones themselves are not that sweet! 

The next part of the recipe requires the use of a regular knife, or a bench knife.

What is a bench knife you may ask? This is it. You're welcome.
Moving right along, using a regular knife of bench knife that you have run under cold water (can't help you with why you need to run it under water, sorry), cut each circle into 6. For those not so hot on fractions, do not cut it in half and then in half again. Just a friendly tip...

Pull the wedges away from the center and separate them just a bit. This is easier said then done...they're very difficult to work with. I almost went all "Psycho" with my regular knife, but reminded myself to stay calm. 

Now, if you're planning on making these right away, place your scones in the freezer for 30 mins. This relaxes the gluten (it's had a hard day) and will make your scones fluffier...or something. 

I put mine in the fridge overnight so that I could bake them first thing in the morning. 

Either way, at this point, pre-heat your over to 425 degrees F. After your gluten is nice and zen, bake the scones for 18-22 mins or until the tops are golden brown. When you go to pull them apart, they should look baked all the way through. 

Serve warm...this is VERY IMPORTANT. Scones need to be eaten when warm. That's just a fact of life. 

Enjoy!

Thursday 17 October 2013

Baked Sweet & Sour Chicken

To give you a quick update, my "Junk Food Free Experiment" is going quite well. I cannot say that I haven't had a COUPLE of slip ups (it was Thanksgiving after all) but otherwise, I've been REALLY good.

Observations so far: The first few days after I started, I was actually feeling kind of depressed. I REALLY wanted to eat a big ol' bag of chips. By Thursday however, I was starting to sleep better, and feeling more rested in the morning. Then Thanksgiving happened, and I was in a food coma for the better part of 3 days.

This week, not much has changed. I'm not sleeping well again, but I have a feeling it might have something to do with the fact we've adopted Maverick (my family dog) and these two silly goofs like to spend the night playing.

In any case, one thing that I HAVE noticed this week, is that I haven't been craving junk food. I mean, every once in awhile I'll want some chips or something, but the craving passes and I'll move on. That's pretty exciting! I also haven't had the urge to snack like a crazy person, so that's also a big "Whoohoo!"

I HAVE been craving Chinese Food recently though, and so has hubs, so I found a recipe for Baked Sweet and Sour Chicken online and decided to give it a try. I had to improvise a bit as I didn't have an ketchup on hand (we're in between grocery shops) but it turned out SO WELL. It was like a less breaded, better for you, Chinese take out meal!

 Although, it turns out, I don't know how to make rice. It came out all soggy and yucky. Didn't matter though, the chicken stood up just fine in it's own!

Baked Sweet & Sour Chicken
adapted from i heart nap time
Ingredients:
3 boneless, skinless chicken breasts, cut into bite sized pieces
1/2 tsp salt
1/4 tsp ground pepper
1/4 tsp garlic salt
3/4 cup corn starch
2 large eggs, whisked
1/2 cup canola oil
For the Sweet & Sour Sauce
1 cup sugar
1 tbsp ketchup
2 tbsp honey garlic BBQ sauce
2 tbsp honey
1 tsp garlic salt
1/2 + 1 tbsp white vinegar
1 tbsp soy sauce

Method:
Place the chicken, salt, pepper, garlic salt & cornstarch into a plastic ziplock bag and toss until chicken is evenly coated. (You can toss in a bowl as well if you don't have a big enough bag)

Next, heat 1/4 cup of the oil in a frying pan (at about medium heat). Dip chicken into the egg and add to your frying pan with a fork. My frying pan isn't huge, so I had to do 1/2 a batch at a time. Fry both sides of the chicken for about 2 min (or until a nice golden brown colour). When done, transfer to a baking sheet lined with FOIL. Parchment paper does NOT work in this case. Just trust me. 

Preheat oven to 325 degrees F.

Do the same for the rest of the chicken using the remainder of the oil. Add to the baking sheet and evenly spread out the chicken on your baking sheet (it's ok if there is a little overlap). 

Whisk together all the ingredients for the sauce. Give it a taste after you're done. If it's too sweet, add a little more vinegar. Too sour? Add some sugar (or ketchup, if you have it). Feel free to experiment a little here, it's fun! 

Using a spoon, drizzle the sauce over the chicken until the chicken is coated.  Place in the oven for 20 mins. Take out and toss the chicken in the sauce on the baking sheet, then add back in the oven for another 15-20 mins. 

Serve with rice and veggies!

Enjoy!


Follow me on Facebook, Twitter & Pinterest too!  

Tuesday 15 October 2013

Gluten-Free Dark Chocolate Pumpkin Brownies

Well my friends, I only have 2 more weeks left of my fall baking series until I switch over to my Holiday Baking Series (which I'm pretty much beside myself with excitement for!). I think out of all the fall recipes I've made so far (here, here and here) these are one of my faves!

Every year for Thanksgiving, my Grandmother brings her ah-mazing pies for dessert (her apple pie is actually the best apple pie in the world. True story) Unfortunately for my sister and her boyfriend though, these pies are not gluten free. So, I promised I would bring a dessert this year that was GF. Originally, I wanted to try and make some Pumpkin Pie Truffles that I saw on Six Sisters Stuff  but ran out of time. So, I sent hubs on an internet mission to find another GF dessert that was quick, easy and looked yummy and thisis what he found at SheKnows.com.

Look at these beautiful things! Fudgy, moist, chocolatey...totally delish. Everyone in the family enjoyed them as well, which doesn't usually happen when it comes to GF food. It was a Thanksgiving Miracle.


Gluten-Free Dark Chocolate Pumpkin Brownies
adapted from SheKnows.com
Ingredients:
4 oz Semi-Sweet baking chocolate
1 3/4 cups canned pumpkin pie filling
1 cup unsweetened apple sauce
2/3 cup plain yogurt (I used Activia)
1 Tbsp vanilla extract
1 cup white sugar
1 cup brown sugar
1 1/2 cup all purpose gluten-free flour (I used Bobs Red Mill)
1/2 cup cocoa powder
1 tsp baking powder
1 Tbsp pumpkin pie spice
1/2 tsp salt

Method: 
In a double boiler, melt the baking chocolate (I don't have a double boiler, so I just places a glass mixing bowl over boiling water) When melted, remove chocolate from the stove and let cool, about 5-10 mins.


Preheat oven to 350 degrees F.

In a LARGE mixing bowl, combine the pumpkin, apple sauce, yogurt, vanilla, melted chocolate and sugar and mix until combined.

In a separate bowl, combine the flour, cocoa powder, baking powder, pumpkin pie spice and salt. I suggest that you sift the flour first as I found mine was quite lumpy. Whisk these ingredients together.

Next, whisk the dry ingredients into the wet (now you'll see why I emphasized LARGE mixing bowl) until combined. Pour batter into a OILED baking dish (Mine was a 14" x 8") and put in the oven.

Bake for about 1 hour. You'll know they are done when you stick a fork into the middle and it comes out clean. Let cool for 30 mins or so before cutting into them. They'll look almost like they aren't done, but trust me, that is the magic of these brownies!


Happy Baking!

- Lisa
Follow me on Facebook, Twitter & Pinterest too! 

Thursday 10 October 2013

Homemade Potato Chips

So I have a new baking bible and it isn't a blog (which is unusual for me). It started out when I saw this amazing cookbook at my friends house called "The Homemade Pantry" by Alana Chernila. First, I was excited because it came from the library and I didn't even KNOW you could get cookbooks at the library. Secondly, the recipes in this book were SO accessible and so easy to follow and for 90% of the recipes, I have the ingredients at home already!


Oh yea...she also had an amazing recipe for Potato Chips.

If you read my blog, you know that I have a bona fide addiction to chips. Chips are my vice. Some people smoke, I cram chips down my throat. However, I'm running a month long junk food free experiment (store bought junk food anyway) and anything that I want to snack on, I have to make myself.

You see where this is going :) Naturally, I took out the book from our Library and got to work right away!

Two great things happened. They were delicious AND after only a small helping, I was completely satisfied. I had NO desire to keep snaking after I had my little serving. Even better, they are baked, yet they taste like deep fried! I cannot WAIT to try more recipes from this book!


Homemade Potato Chips

**NOTE: This recipe is for a big batch. I only used about 3 small potatoes and still came out with a serving. You can adjust this recipe for whatever works best for you!**
Ingredients:
3 tbsp olive oil
1 tsp salt
1 1/2 pounds of potatoes (any kind), scrubbed 

Method:
Preheat your oven to 450 degrees F. Using a touch of olive oil, grease 2 baking sheets.

Fill a large mixing bowl with water and 1/2 a tsp of salt. Stir to make sure the salt has dissolved in the water. 

If you have one (I don't) use a mandolin to cut your potatoes into 1/16th inch slices. I used a sharp knife to cook mine. I'm not sure how thick they were, but they turned out just great. Just try and slice them as thinly as you can! As you slice your taters, place them in the bowl and let them soak for 5 mins.

Remove the potatoes from the water and dry them off. Empty your bowl, dry it out, and place the potatoes back in the bowl and toss in the olive oil & remainder of the salt. Trust me when I tell you, it is enough salt. Any more and they will be too salty!

Spread the potatoes out on your baking sheet and try and spread them out so that there is almost no overlap. Place in the oven for 15 mins then reduce the heat to 300 degrees F. Rotate the pans and bake for another 15 mins. Switch again and bake for a final 15 mins (total baking time of 45mins). 

As you're baking them, you may notice some of them are done sooner than the others (especially if you cut them by hand and some are thinner than the others). Remove them as they become golden and dry and start peeling off the baking sheet. Some may need to stay in the oven for another 5-10 mins after all the others are done. Just make sure you keep watching them!

Remove from baking sheet & enjoy! They have such a great crunch to them and a fantastic salty flavour. 

If you want to store them, you can keep them in an airtight container for up to 2 weeks (good luck keeping them that long!)

Let me know if you try them, I'd love to hear how they turned out! Also, I HIGHLY suggest you check out this cookbook, it's fantastic! :)

Sunday 6 October 2013

Why I'm Taking a Month Off From Junk Food

My name is Lisa and I have a serious addiction to chips.

I know what you're thinking. "Oh totally, me too Lisa. I'm also addicted to chocolate, tee hee"

What I'm talking about is totally different. As I've told you before, I'm an anxious person. Some people quiet their anxiety with drugs, alcohol or other activities. I quiet mine with food and chips are my "Drug" of choice. 

I know I'm not alone in this either. Lots of people do it, food is comforting, doesn't talk back, and you're still able to function in a way that you can't if you're on drugs or alcohol. I would say that food is the most socially acceptable addiction out there. This is just my opinion.

In July, I posted "Dealing with my Food Demon" and I talked about my struggles with anxiety, food and junk food in particular. The good news is, since back on my meds, I've found the motivation to start working out again. Since I'm working out again, I'm able to be more focused and happy. Due to this, I'm able to keep my anxiety down or at least manage it better.

I still can't kick my addiction to junk. I'm also 100% serious when I call it addiction. Not in the same way drugs and alcohol can become addicting, but more in the sense that I can't go a day without having chips. I think about them all day at work, I think about what flavour I could try next, and I CRAVE the crunch and salt texture they have. I try and substitute with healthier options, but that craving is still there. I actually get aggravated if I don't eat them. It's actually something that I'm kind of embarrassed about.

However, I just chalked it up to being bored, or "just being a snacker" even though I knew it was more. However, I figured, aside from the health "risks" of chips, I could still function properly.

Then, as I was scrolling through Twitter yesterday, I saw this article about giving up junk food from The Huffington Post and read this...

"I felt tired. Sometimes I felt exhausted. My head was in a fog at the mere age of 24. My mood was one of apathy even though I had a full-time job, great friends, and shared a nice apartment. How did I know this dazed and confused feeling might be from my diet? Instincts, perhaps. I figured there had to be some correlation between my energy levels and the junk that I was consuming day in, day out. My lack of energy and slight listlessness was driving me crazy..." 

Shit...this was me. Even though I KNOW how junk food can have this effect on you, I never put two and two together (I'm blonde, alright??) I guess I just never thought about how MUCH the junk I put in my body was affecting me. I'm active, I eat right most of the time, but I was still pumping chemicals in me. DUH. No wonder I'm tired, lethargic and foggy headed. No wonder I'm still moody and cranky. EVERY DAY I'm stuffing my face with junk.

The Experiment

I have decided to try an experiment. For one month, I'm going to stop eating chips and other crap. If I want a snack/treat, I have to make it myself. That even include chips. I know I could make them on my own, but I've been too lazy. If I want cookies or chocolate - gotta bake it.

Since I will need support for this, my poor husband is going to join me. He's agreed to only eat snacks that we make from scratch. He's an M&M fiend, so this will be hard for him as well, but I think important that we both just give it a try. It's only one month. We will try to include more veggies and fruits into our meals as well (although, we're pretty good at this already).

Molly the dog (who probably could stand to loose a few anyway) will be joining us for this adventure. I will be making her treats from scratch for the next month. She's already on good food, so that's not a problem.

This adventure also requires that we don't eat out. This includes Little Cesar's Pizza (Hubby is also a big fan of that). If we want Pizza, we have to make it from scratch. Everything and anything we want to eat, we have to MAKE.

My hypothesis? That Hubs and I will feel better, have more energy & sleep better at night. It's going to be damn hard. Like, really, really hard. However, I have learned from a good friend of mine that instead of looking at the scary time frame, we will just take it one day at a time. It is, after all, only 1 month. 

A few exceptions:

I will allow myself Pop Chips every now and then (MAX 1 time a week)
Jon is allowed M&M's every once in awhile as well
If we go out for a meal, it will only be for a special occasion

I will post throughout the whole process and continue to share yummy recipes with you! I'm hoping this will require me to step out of my comfort zone a bit as well.

Wish us luck!