

Thursday, 18 December 2014
Saturday, 29 November 2014
Ranch Lovers Potato and Leek Soup #HiddenValleyGFChallenge

Enter Hidden Valley Ranch - last month they asked that I try out their new GLUTEN FREE dressings. First, who knew that Ranch dressings had gluten in them? Second, I love Ranch to dip Pizza, Veggies, Fries in, so I wanted to give it a shot. They very generously sent me 3 bottles - regular, 3 cheese and J's new favourite - SPICY (that bottle didn't last long).
Anyway, the challenge is to created a gluten free recipe using their ranch dressing. I've spent the better part of the month trying to come up with something unique, yummy, easy and BIG so that I could make multiple portions to eat over the week.
Today, I was sitting watching Ree Drummond make a potato soup for the freezer and it hit me...why not try a Potato & Leek Ranch Soup? Sounds kind of weird right? Never fear, I wouldn't dare lead you astray. I combined a variety of ingredients (including LEEK which I've never used before) with the Hidden Valley Ranch dressing in the hopes of creating a hearty, savoury soup. Guess what? This soup is SO GOOD!! Warm, comforting, easy & loaded with veggies! Plus it makes enough for about 6-8 portions, so I can freeze a bunch for later this week!

Ranch Lovers Potato and Leek Soup
inspired by Ree Drummond
Ingredients:
1 head of cauliflower, cut into small florets
3 large red skin potatoes, peeled and cubed
3 cups chicken broth
2 leeks, white parts only halved & sliced
1 medium yellow onion, diced
1 large carrot, peeled, halved & thinly sliced
1 tbsp butter
2 cups half & half
3/4 cup Hidden Valley Ranch
3 tbsp Franks Red Hot (optional)
Salt & Pepper to Taste
Shredded Old Cheddar
Method:
In a large stock pot, add the cauliflower, potatoes and chicken broth. Bring to a boil then let simmer on low heat until cauliflower and potatoes are soft.
While the potatoes and cauliflower are cooking, chop and peel your leeks, onion and carrots. Melt butter in a saucepan and add veggies. Cook on low until tender, about 10-15 minutes.
Once the cauliflower and potatoes are cooked, mash them together with a potato masher. You still want there to be a little "chunk" left, so don't puree them. Once all mashed together, add in the veggies, cream, ranch, salt & pepper and Franks. Stir together and add back to heat. Bring to a boil and let simmer for about 5 minutes, stirring every now and then. When soup has thickened (slightly) remove from heat.
Shred some old cheddar on top if you want an added kick and serve!
Again, I know this sounds weird (Ranch Dressing in Soup?) but I promise you, it's absolutely scrumptious!
If you love Ranch (like J and I do) I highly suggest you check out the Hidden Valley Ranch Facebook Page - TONS of awesome recipes to try!
*Disclosure - I was compensated to write this post, but all opinions are my own. Also, this recipe is actually REALLY good. It sounds weird, but the soup is amazing!*
Monday, 24 November 2014
Some of my FAVOURITE Gifts to Give this Year
Well Friends, it's that time of year! CHRISTMAS!!!!! I frigging LOVE Christmas. I love the build up, the music, the parties, buying gifts...all of it! However, I find every year it gets harder and harder to give GREAT gifts. Let's face it...we're in a time where if you want something, you go out and buy it. Sure, there are a few things that people wait on, but those aren't thins I can afford to give them (no matter HOW amazing a Black Friday deal is!)
So, what I've decided to do this year, is put together a list of some of my favourite things to give/things that I'm giving this year. I promise this list is MUCH more affordable than Oprah's.
Disclaimer - this post was written completely of my own accord. I haven't received anything to write this post, I purely did it to tell you about some things I love and am excited about.

Chic Tags
I first came to know about Chic Tags through a friend of mine. I saw some of the beautiful things she had done and fell in love. Then, a short while later, I recieved something from Chic Tags as a gift from a friend and I was SOLD! I've been stalking her site from quite some time now and just recently settled on a piece (I can't tell you what in case someone is reading and sees this!) but I can tell you that it looks beautiful. These personalized pieces are fantastic for Mom's, Dads, ANYONE really. I highly recommend her product.
Clippo
So, I've been following the Clippo site now for about 3-4 years. I absolutely LOVED the product, but I never had anyone to but them for (and I'm not really sure J would want mitten Clips...even if he needs them!) In any case, Alex (the owner) had to shut down the site for a bit, but recently started back up again and I'm in love with EVERYTHING...seriously. Look at some of these...
CoreEssentials Fitness
You may or may not have heard me harp on before about how much I love my friend Anne. Anne is the one behind me running my first half marathon, getting my Zumba Instructors License and helped me find joy in exercising. Recently, I was reflecting on this and thought - what a great Christmas Gift for the person who has everything? Something to use in the New Year when you feel like your pants don't fit & you want to start fresh. I also promise you, one class with Anne & you'll be hooked - whether it's Pilates, Boot Camp, Tabata...whatever. I highly recommend a class pass! If you're interested, you can reach out to her on her Facebook Page!
If you're not local to CoreEssentials Fitness - Try searching your area for a unique & different exercise class. Maybe Hot Yoga or Pole Dancing (yes, it's a thing & yes, it's a lot of fun) or an Outdoor Boot Camp (if you're somewhere warm). This sounds cheesy, but the gift of fitness is a pretty amazing thing. Plus, while you're at it, pick something up for yourself to try in the New Year!
Baked (or not yet baked) Goods
Fudge
Bakery Charms
Okay, I am certifiably OBSESSED with this woman's work. I found her on Instagram about 6 months ago and I haven't turned back since. This lovely lady resides in Hawaii and hand makes ALL of her beautiful charms. Anything from Cake slices, Macrons, Cake Pops to a BANANA SPLIT and Cupcakes...I could go on. I'll show you a couple pictures here, but to really get the full effect, go follow her on Facebook...you won't regret it! Here are a couple of my faves:
And my personal favourite...
ErinCondren.com
Believe it or not (and most of my friends probably won't believe this) but I LOOOVE calendars. At any given time, I probably have 5 or 6. Here's the thing...I write down differnent things on different calendars...and then forget half the things I'm supposed to do...SO, for the unorganized (or UBERorganized) friend in your life, enter Erin Condren. Her life planners and pretty much porn. They're well thought out, beautiful colours and you can personalize them. Now, they aren't cheap but considering they will help keep you (or your friend/mother/significant other) sane for one whole year...$50 is a small price to pay.
I love them all!
THEN, we have gifts for people you want to give a little something too, but don't neccesarily want to buy anything...(this is where I shamelessly promote some recipes on my blog)
FOOD GIFTS!
The beautiful thing about food gifts, is you can make a batch and divvy up into a few different gifts. All you need is some cello, some ribbon and BOOM you have a gift.
Here are some that I enjoy giving:
Candy Cane Fudge

EggNog Truffles

Salted Caramel Pretzel Bark

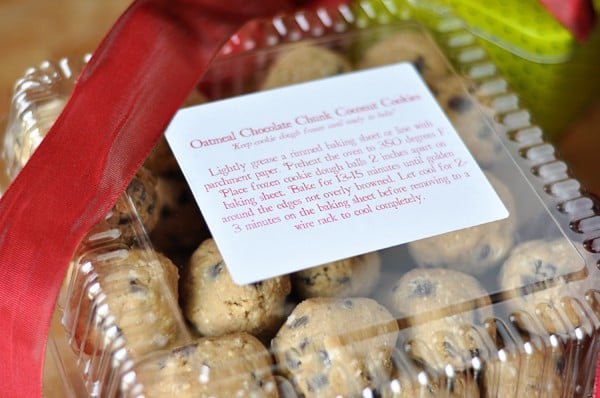
Another amazing idea (found on Pinterest, obviously) is to give a batch of FROZEN dough. That way people can save these treats for later (instead of feeling like they have to eat them right away) and they can bake the whole batch or one at a time!
Now, if you're looking for something personalized & unique I suggest you check out Etsy (I have already bought 3 gifts on there). I could get lost on that site for days! Plus, I love that when you buy something from that site, you're helping a small business grow.
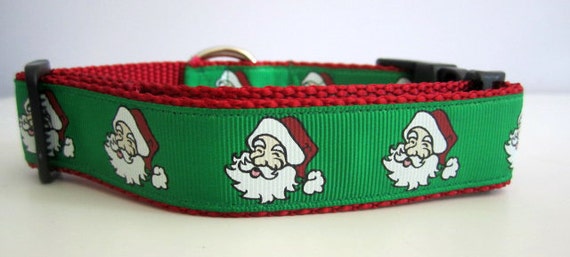
For example...you cannot forget about your furry, four legged friends. Check out this adorable dog collar from Canine Designs:
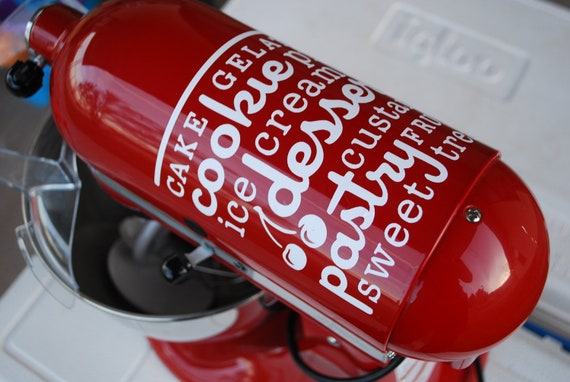
OR *cough* for the baker in your life *cough* a little something special for them to look at while baking some amazing and delicious treats for you........
Finally, if all else fails...go to"Gifts" Board on Pinterest and find that perfect little something!
What are gifts that you are excited about giving this year? I'd love to hear your ideas!
Happy Holidays!
Lisa
So, what I've decided to do this year, is put together a list of some of my favourite things to give/things that I'm giving this year. I promise this list is MUCH more affordable than Oprah's.
Disclaimer - this post was written completely of my own accord. I haven't received anything to write this post, I purely did it to tell you about some things I love and am excited about.
Chic Tags
I first came to know about Chic Tags through a friend of mine. I saw some of the beautiful things she had done and fell in love. Then, a short while later, I recieved something from Chic Tags as a gift from a friend and I was SOLD! I've been stalking her site from quite some time now and just recently settled on a piece (I can't tell you what in case someone is reading and sees this!) but I can tell you that it looks beautiful. These personalized pieces are fantastic for Mom's, Dads, ANYONE really. I highly recommend her product.
 |
| Available Here |
Clippo
So, I've been following the Clippo site now for about 3-4 years. I absolutely LOVED the product, but I never had anyone to but them for (and I'm not really sure J would want mitten Clips...even if he needs them!) In any case, Alex (the owner) had to shut down the site for a bit, but recently started back up again and I'm in love with EVERYTHING...seriously. Look at some of these...
| $14 - Available Here |
| Mitten Clippos $14 - Available Here |
| Card Wallet $15 - Available Here |
There are things for everyone & great shipping offers (if you're local, it's FREE!) Plus, you can feel good knowing, you're buying something local and from an outstanding lady!
CoreEssentials Fitness
You may or may not have heard me harp on before about how much I love my friend Anne. Anne is the one behind me running my first half marathon, getting my Zumba Instructors License and helped me find joy in exercising. Recently, I was reflecting on this and thought - what a great Christmas Gift for the person who has everything? Something to use in the New Year when you feel like your pants don't fit & you want to start fresh. I also promise you, one class with Anne & you'll be hooked - whether it's Pilates, Boot Camp, Tabata...whatever. I highly recommend a class pass! If you're interested, you can reach out to her on her Facebook Page!
If you're not local to CoreEssentials Fitness - Try searching your area for a unique & different exercise class. Maybe Hot Yoga or Pole Dancing (yes, it's a thing & yes, it's a lot of fun) or an Outdoor Boot Camp (if you're somewhere warm). This sounds cheesy, but the gift of fitness is a pretty amazing thing. Plus, while you're at it, pick something up for yourself to try in the New Year!
Baked (or not yet baked) Goods
Fudge
Bakery Charms
Okay, I am certifiably OBSESSED with this woman's work. I found her on Instagram about 6 months ago and I haven't turned back since. This lovely lady resides in Hawaii and hand makes ALL of her beautiful charms. Anything from Cake slices, Macrons, Cake Pops to a BANANA SPLIT and Cupcakes...I could go on. I'll show you a couple pictures here, but to really get the full effect, go follow her on Facebook...you won't regret it! Here are a couple of my faves:
 |
| Cake Pop - Available Here |
 |
| Belgian Waffle - Available Here |
 |
| Coffee and Donut Earrings - Available Here |
Believe it or not (and most of my friends probably won't believe this) but I LOOOVE calendars. At any given time, I probably have 5 or 6. Here's the thing...I write down differnent things on different calendars...and then forget half the things I'm supposed to do...SO, for the unorganized (or UBERorganized) friend in your life, enter Erin Condren. Her life planners and pretty much porn. They're well thought out, beautiful colours and you can personalize them. Now, they aren't cheap but considering they will help keep you (or your friend/mother/significant other) sane for one whole year...$50 is a small price to pay.
I love them all!
 |
| Available Here |
THEN, we have gifts for people you want to give a little something too, but don't neccesarily want to buy anything...(this is where I shamelessly promote some recipes on my blog)
FOOD GIFTS!
The beautiful thing about food gifts, is you can make a batch and divvy up into a few different gifts. All you need is some cello, some ribbon and BOOM you have a gift.
Here are some that I enjoy giving:
Candy Cane Fudge
EggNog Truffles
Salted Caramel Pretzel Bark
Another amazing idea (found on Pinterest, obviously) is to give a batch of FROZEN dough. That way people can save these treats for later (instead of feeling like they have to eat them right away) and they can bake the whole batch or one at a time!
 |
| From Mel's Kitchen Cafe |
For example...you cannot forget about your furry, four legged friends. Check out this adorable dog collar from Canine Designs:
 | |||
| Available Here |
OR *cough* for the baker in your life *cough* a little something special for them to look at while baking some amazing and delicious treats for you........
 |
| Available Here |
What are gifts that you are excited about giving this year? I'd love to hear your ideas!
Happy Holidays!
Lisa
Thursday, 13 November 2014

Sunday, 2 November 2014
Wednesday, 22 October 2014

Monday, 6 October 2014
Glad Fresh Food Challenge
Hi Friends!
I want to tell you, I've really missed blogging. Every time I make something I think "this would be AWESOME on the blog" but had to remind myself that I'm taking a break.
Well, we just finished moving on Saturday and I can barely contain my excitment - I have a BEAUTIFUL kitchen now that is screaming for me to bake, bake, bake and who am I to say no?. I'm very happy to say that I'm going to start writing again. It won't be all the time, and it may be spotty at time, but I'm coming back!
To kick off my posting again, I want to tell you about something I'm working on right now - the #GladFreshFoodChallenge! Here is a few "fun" facts:
How do we do this? Proper storage and a little bit of organization.
Now, for storage, a trick that I've used since University is when buying meat in bulk (like multiple chicken breasts), store each piece (or serving) in Freezer Bags (or Glad Press & Seal works nicely). That way, you can take out ONLY as much as you need at a time. This is especially helpful when you're only cooking for two people (like I am).
For organization - I find that when I put leftover in the fridge to "save" for later, I often push the previous leftovers to the back of the fridge to make room for the new. I find these (fuzzy) leftovers about month later and go "oh yea!"
My solution? Put newest leftovers behind the old and rotate them out that way! I also find writing on the plastic wrap/zipper bags helps to keep track of what needs to be used next!
You can also plan one night a week where you use up what is in the fridge! If you don't know what to make, go to Allrecipes, input your ingredients & it'll tell you what you can make! I promise you'll try things you never even thought of!
This month, I'm attempting to go do the #GaldFreshFoodChallenge and go a FULL MONTH without throwing away any food. None at all (except for the parts of vegtables you can't eat). I'll be posting recipes & tips along the way! I do hope you'll join me!
Stay tuned!
Lisa
**Disclaimer: I am working with Glad on this initiative & was given materials to do this challenge but all thoughts & feelings are my own**
I want to tell you, I've really missed blogging. Every time I make something I think "this would be AWESOME on the blog" but had to remind myself that I'm taking a break.
Well, we just finished moving on Saturday and I can barely contain my excitment - I have a BEAUTIFUL kitchen now that is screaming for me to bake, bake, bake and who am I to say no?. I'm very happy to say that I'm going to start writing again. It won't be all the time, and it may be spotty at time, but I'm coming back!
To kick off my posting again, I want to tell you about something I'm working on right now - the #GladFreshFoodChallenge! Here is a few "fun" facts:
- The typical Canadian household s[pends $5,572 per year on grocery food items ($465 of that is on fruits and vegetables)
- On average 13% (or $725 worth) of food all is thrown out! That's almost 2 months worth of groceries!
- That means, on average you and I waste $175 per year of food!
How do we do this? Proper storage and a little bit of organization.
Now, for storage, a trick that I've used since University is when buying meat in bulk (like multiple chicken breasts), store each piece (or serving) in Freezer Bags (or Glad Press & Seal works nicely). That way, you can take out ONLY as much as you need at a time. This is especially helpful when you're only cooking for two people (like I am).
For organization - I find that when I put leftover in the fridge to "save" for later, I often push the previous leftovers to the back of the fridge to make room for the new. I find these (fuzzy) leftovers about month later and go "oh yea!"
My solution? Put newest leftovers behind the old and rotate them out that way! I also find writing on the plastic wrap/zipper bags helps to keep track of what needs to be used next!
You can also plan one night a week where you use up what is in the fridge! If you don't know what to make, go to Allrecipes, input your ingredients & it'll tell you what you can make! I promise you'll try things you never even thought of!
This month, I'm attempting to go do the #GaldFreshFoodChallenge and go a FULL MONTH without throwing away any food. None at all (except for the parts of vegtables you can't eat). I'll be posting recipes & tips along the way! I do hope you'll join me!
Stay tuned!
Lisa
**Disclaimer: I am working with Glad on this initiative & was given materials to do this challenge but all thoughts & feelings are my own**
Tuesday, 16 September 2014
5 Regrets of the Dying: Important Life Lessons
 |
| Image Source: Phillip Brande |
Top 5 Regrets of the Dying
by Bronnie Ware
For many years I worked in palliative care. My patients were those who had gone home to die. Some incredibly special times were shared. I was with them for the last 3 to 12 weeks of their lives.
People grow a lot when they are faced with their own mortality. I learnt never to underestimate someone's capacity for growth. Some changes were phenomenal. Each experienced a variety of emotions, as expected, denial, fear, anger, remorse, more denial and eventually acceptance. Every single patient found their peace before they departed though, every one of them.
When questioned about any regrets they had or anything they would do differently, common themes surfaced again and again. Here are the most common five:
1. I wish I'd had the courage to live a life true to myself, not the life others expected of me.
This was the most common regret of all. When people realise that their life is almost over and look back clearly on it, it is easy to see how many dreams have gone unfulfilled. Most people had not honored even a half of their dreams and had to die knowing that it was due to choices they had made, or not made.
It is very important to try and honour at least some of your dreams along the way. From the moment that you lose your health, it is too late. Health brings a freedom very few realise, until they no longer have it.
2. I wish I didn't work so hard.
This came from every male patient that I nursed. They missed their children's youth and their partner's companionship. Women also spoke of this regret. But as most were from an older generation, many of the female patients had not been breadwinners. All of the men I nursed deeply regretted spending so much of their lives on the treadmill of a work existence.
By simplifying your lifestyle and making conscious choices along the way, it is possible to not need the income that you think you do. And by creating more space in your life, you become happier and more open to new opportunities, ones more suited to your new lifestyle.
3. I wish I'd had the courage to express my feelings.
Many people suppressed their feelings in order to keep peace with others. As a result, they settled for a mediocre existence and never became who they were truly capable of becoming. Many developed illnesses relating to the bitterness and resentment they carried as a result.
We cannot control the reactions of others. However, although people may initially react when you change the way you are by speaking honestly, in the end it raises the relationship to a whole new and healthier level. Either that or it releases the unhealthy relationship from your life. Either way, you win.
4. I wish I had stayed in touch with my friends.
Often they would not truly realise the full benefits of old friends until their dying weeks and it was not always possible to track them down. Many had become so caught up in their own lives that they had let golden friendships slip by over the years. There were many deep regrets about not giving friendships the time and effort that they deserved. Everyone misses their friends when they are dying.
It is common for anyone in a busy lifestyle to let friendships slip. But when you are faced with your approaching death, the physical details of life fall away. People do want to get their financial affairs in order if possible. But it is not money or status that holds the true importance for them. They want to get things in order more for the benefit of those they love. Usually though, they are too ill and weary to ever manage this task. It is all comes down to love and relationships in the end. That is all that remains in the final weeks, love and relationships.
5. I wish that I had let myself be happier.
This is a surprisingly common one. Many did not realise until the end that happiness is a choice. They had stayed stuck in old patterns and habits. The so-called 'comfort' of familiarity overflowed into their emotions, as well as their physical lives. Fear of change had them pretending to others, and to their selves, that they were content. When deep within, they longed to laugh properly and have silliness in their life again.
When you are on your deathbed, what others think of you is a long way from your mind. How wonderful to be able to let go and smile again, long before you are dying.
Life is a choice. It is YOUR life. Choose consciously, choose wisely, choose honestly. Choose happiness.
Credit: Huffington Post
Friday, 5 September 2014
Stepping Back
My Dear Friends & Readers,
It is with a heavy heart, I've made the decision to step back from Running to Bake for awhile. I've been thinking long and hard about this decision and after MUCH deliberation I feel that it is the right choice for three reasons:
1. I feel like I've really strayed from the original purpose of the blog. While I still run, it is NOT a main focus in my life any more and it feels silly to have a blog where I don't even talk about something that is in the name.
I still bake, but not as often as I'd like to, and it is becoming harder and harder for me to post recipes.
My goal is to step back from here, re-group & figure out where I see this blog going.
2. Right now, I'm dealing with a lot of emotional baggage. My anxiety is at an all time high, as is my eating/binging. I feel that I need to step back and take some time for me. I've already put a lot of important things in place, but having this blog and not posting to it causes me a lot of stress. .
I also don't feel like I have much more to give anywhere, let alone here.
3. Work. Ah, isn't is always work that gets in the way? In my case, it is a happy change at work but will require more and more time & energy from me. I won't have the time/energy after work to back, take pictures & post, especially as I enter the busy season at work.
This is by NO means the end, far from it. This is just a break to figure out what the next steps are.
I will still post from time to time on my Facebook Page with great recipes and funny pictures as I will be pinning & tweeting. I just won't be posting here.
Thank you so much to everyone who has read this blog (especially my amazing friends who read every post & tell me on a regular basis how much they love my blog, I can't tell you how much that means to me) and I hope you will re-join me in 2015 for all new adventures.
Love you all, Lisa
Tuesday, 12 August 2014
Let's Talk About Depression
 |
| image from: The Organic Prepper |
That totally shakes up our impression of depression. When "we" think depression, we think sad, forlorn, can't leave the house, etc. We definitely don't think a seemingly happy, funny & outgoing person would/could EVER fall that low.
In light of his death, I think there are two VERY important lessons to be learned. The first, depression & mental health issues are not specific to gender, age, race or social class. They are not always bound to a life event (like a death). Depression can hit at any time, when you least suspect it.
Secondly, knowing that no one is immune, it is important that we remove the stigma & that everyone to feel safe to come forward and acknowledge this pain in their life. Unfortunately, most people don't feel safe to do so. They feel it is a weakness to be depressed, that they should feel ashamed. To admit to being depressed is to admit that there is something "wrong" with them. This can lead people to start drinking, doing drugs, excessively overeat and other unhealthy coping mechanisms.
If you're reading this & feeling depressed please know: Do NOT be ashamed. Being depressed is not a weakness, just like having cancer is not a weakness. There is absolutely NOTHING and I mean NOTHING wrong with reaching out to a friend, family member or professional. You may need to take medication. There is nothing wrong with needing medication to HELP you. Diabetics need insulin so they can live. Depression is the same way & while medication isn't the only answer, it can help get you on the right track.
If you read my blog regularly, you know that I too, struggle with depression (see here ) and it took me some time to come to terms with it. I'm still dealing with the fact that it comes and goes & is a part of my life. I still struggle greatly with my drug of choice (food). However, I'm lucky to have a wonderful husband, friends & family that I can talk to, will listen to me & will be there for me when I need it, just like I will be to them. I'm also lucky to have supportive people in my life who encourage me to find help, which I am now.
Reach out, there is ALWAYS someone who will be there to help you, friend or otherwise. Suicide is never the answer, ever. There is so much to live for on this beautiful planet, don't take that away from yourself.
Useful Links for Getting Help
Ontario & Canada
http://www.mentalhealthhelpline.ca/
http://www.cmha.ca/mental_health/getting-help/#.U-ozaXfkqUk
http://www.kidshelpphone.ca/teens/home/splash.aspx
http://www.suicidepreventionlifeline.org/
http://suicideprevention.ca/
Worldwide:
http://en.wikipedia.org/wiki/List_of_suicide_crisis_lines
Wednesday, 6 August 2014

Thursday, 31 July 2014

Wednesday, 23 July 2014
Cake Batter Cinnamon Rolls + Glaze

Until I saw these "Cake Batter Cinnamon Rolls" on Pinterest. I simply couldn't pass by these beautiful looking things without taking a closer look. I even couldn't resist them when I saw how much time they took. Plus, I haven't done much baking recently, so I decided to go all out. Hashtag Yolo...or whatever.

Man, these things are GOOOOOOOD. I'll have to admit, I don't really get a "cake batter" vibe from them, but even still, they are worth every second spent on them.You also MUST make the glaze. It takes them from "This are really good" to "AJNFKSJN!##!(U@!!!!!!!"
Be warned - these take time, so this is not a good last minute dessert to whip up before a BBQ (as I may or may not have tried to do). Also, it's a little bit tedious working with the dough, rolling it up and cutting it, but after a couple tries, you'll be a pro!

Cake Batter Cinnamon Rolls + Glaze
Ingredients:
For the dough:
1 cup milk (any)
2/3 cup white sugar
1 & 1/2 tbsp active yeast (2 packets)
1/2 cup butter, room temp
2 large eggs
1/2 tsp salt
4 & 1/2 cups all-purpose flour (plus some for dusting/rolling)
For the filling:
1/2 cup sugar
3/4 cup all-purpose flour
2 tbsp dry milk powder (any will do)
1/4 tsp salt
1/4 cup butter, cold & cut into 4 pieces
1 tsp vanilla
1/2 cup sprinkles
6 tbsp melted butter
1 tbsp ground cinnamon
For the glaze:
1 cup icing sugar
3 tbsp heavy cream (or milk)
1 tsp vanilla
Method:
First, we make the dough. In a small saucepan, warm the milk over low heat until it is lukewarm (make sure not to scald the milk, that will cause problems with the yeast). Pour the warm milk into the bowl of a stand mixer. Manually stir in the white sugar and yeast. Cover with a towel and let sit for about 5 minutes (or until the mixture is nice and foamy). Manually stir in the butter and eggs with a whisk. Attach the dough hook and set to medium speed while you slowly add the flour. Once all added, scrape down the sides and turn to medium high speed. Let the mixer knead for about 6 minutes.
Transfer dough to a floured surface and knead with your hands for about 2 minutes. Form into a ball and set in a lightly greased bowl. Cover and let rise for 1 - 2 hours or until doubled in size.
Line the bottom of a 9 x 13 inch baking pan with parchment paper making sure there is extra at the ends. Place dough on a lightly floured surface and roll out to 10 x 24 inch rectangle. It is important that the dough has even thickness and is nice and smooth.
Now we make the filling. In a food processor, combine sugar, flour, milk powder and salt. Process for 10 seconds. Add the butter and chop for another 10 seconds. Add vanilla and process again until the mixture is crumbly. Transfer to a small bowl and stir in the sprinkles.
Using a pastry brush, brush the melted butter over the dough and sprinkle cinnamon over top. Sprinkle 3/4 of the filling you just made over top (there will be some left, head over to Sally's blog to check out how to use the leftovers).
Tightly roll up the dough to form a 24 inch log. Using a sharp knife, slice the rolls into about 1.5" pieces (will make about 15 rolls) and place in your prepared pan, filling side up. Cover with a towel and let rise for about 2 hours (or even overnight if you want to make them for breakfast!)
Preheat oven to 400 degrees F. Cover rolls with tinfoil and bake for about 25 minutes or until golden brown. Transfer your pan to a cooling rack and let sit for 15 minutes.
To make the glaze - whisk together the icing sugar, milk and vanilla. Add milk or icing sugar to reach your desired texture. Drizzle over buns and serve warm!
Store unglazed buns in an airtight container for up to a week in the fridge. Microwave for 30 seconds and add glaze before serving.
Enjoy!
Lisa
Wednesday, 25 June 2014
Apple Crumble Muffins
Either way...these are to DIE for!

Apple Crumble Muffins
Ingredients:
For the Crumble Topping:
1/3 cup light brown sugar
1 tbsp granulated sugar
1 tsp ground cinnamon
1/4 cup unsalted butter, melted
2/3 cup all purpose flour
For the muffins:
1/2 cup butter, room temp
1/2 cup light brown sugar
1/4 cup granulated sugar
2 large eggs
1/2 cup sour cream (or yogurt)
2 tsp vanilla extract
1 & 3/4 cup all purpose flour
1 tsp baking soda
1 tsp baking powder
1 tsp ground cinnamon
1/2 tsp salt
1/4 cup milk
1 & 1/2 cups peeled and chopped apples (I used Granny Smith)
Method:
First, we make the crumb topping: in a small bowl, whisk together the brown sugar, white sugar, cinnamon and melted butter. Add in the flour and "chop" in with a spatula. You want the topping to be thick and crumbly. I found I needed to add a bit more flour to achieve this consistency. Set aside.
Preheat oven to 425 degrees F. Line 2 muffin tins with 14 liners.
Next, the muffins!: In the bowl of a stand mixer with the paddle attachement (or in a medium bowl with a hand mixer) beat the butter until it is nice a fluffy (about 1 minute). Add the sugars and beat for another 2 minutes or until fully creamed together. Scrape down the sides of bowl and bottom a couple times just to make sure everything is fully integrated.
Add the eggs, sour cream and vanilla and beat on high speed for about 2 minutes or until everything is combined evenly. Again, make sure to scrape down the sides of the bowl and the bottom of the bowl a couple times.
In a large bowl, using a wooden spoon, stir together the flour, baking soda, baking powder, cinnamon and salt. Add the wet ingredients to the dry and mix together with a whisk. Add the milk and gently combine with the whisk. Fold in the apples with a wooden spoon.
Spoon the batter between the 14 liners, filling them almost all the way to the top. Press a generous amount of the crumb topping on each. Don't be shy with this, this is one of my favorite parts of the muffin!
Bake for 5 minutes at 425 then reduce the heat to 350 and bake for about 18-20 minutes, watching them after the 18 minute mark. I took mine out a little early, but if you want a really dark golden crumbly top, leave in for the 20 minutes.
Remove and let cool in the pan for about 5 minutes then transfer to a wire rack. Truth be told, we ate one RIGHT away and it was sooooooooo good.

Enjoy!
- Lisa
Monday, 23 June 2014
8 Tips to Having a Great Run, Every Run

So...if you want to run, or if you are like me and love running, but have some weird hang ups with it, here are the tricks I've been using to get out of my head and back into running [note: this tricks can really be used for getting yourself out the door for any form of exercise].
Sometimes the hardest part of running is just getting out the door. I'm sure you have 100 reasons why you can't go for a run today. Either you're "too tired" or "don't have enough time" or "I'll go tomorrow" whatever it is, there will ALWAYS be a reason.
TIP 1: No matter what, just put on your workout gear and get out the door. I'll often trick myself into going out by saying "OK, even if I only go for 5 minutes, I at least got out" Give yourself an out so the whole task doesn't seem as daunting.
Ok, so now you're out the door. AWESOME! Time to start...
TIP 2: Have a playlist of music that is going to pump you up. I like to listen to cheesy dance music from the 80's because I can sing along and it makes me smile. I also have some great "kick ass" songs that I go to if I need a boost like "Work B*tch" by Britney Spears. Whatever it is that gets you going...put that on and start jogging
I find that when I run with people for the first time, they start off like a shot and about 5 minutes in, they are spent. They get frustrated and are upset that they have to stop and walk.
TIP 3: Start SLOWLY. If you feel yourself running out of breath quickly, you're probably going too fast. Drop your pace down. You may feel like you are walk/jogging but that's ok! You want to go at a pace that you could hold a light conversation at.
TIP 4: Pay attention to your breathing! You want your breathing to be calm and not rushed/hurried. If you find yourself REALLY panting, SLOW DOWN. I find a very useful trick to regulate my breathing is: Breath in for 4 steps, breath out for 4 steps. This gets your brain re-focused and better breathing makes for a better run.
Okay, at this point, you're probably doing OK, but your legs are tired and you're kind of bored. At this point, your head will start trying to trick you and go "Lets just walk. Your legs are really tired and your sort of out of breath. Just walk"
TIP 5: Unless you are going to pass out or you have a sharp, stabbing pain...DON'T STOP. This is alllllll in your head. When I get to this point in a run, I go "ok, I'm going to get to that tree up there and then I'll stop" and then I get to the tree and realize I'm ok so I'll pick another tree down the way and jog to that and so on and so forth. This keeps your brain occupied and off of the discomfort you are feeling in your legs (which is completely normal) and keeps YOU motivated.
In the same vein...
TIP 6: Try not to think about how much longer you have to run. Whether you're running for a period of time or for a specific KM, don't think about how much further you have to go until you're done...think about that next tree, that next stop light. If you think about how much further you have to go, you'll overwhelm yourself and this can be quite discouraging. Literally take your run, ONE STEP at a time.
Listen, sometime, you need to walk & that is TOTALLY OK. Sometimes, you'll hit a wall and you literally cannot continue running. That's totally normal too. The idea with these tips is not to force yourself to run NO MATTER WHAT, but are more meant to help you keep your motivation going and keep yourself in the moment and out of your head.
Two more tips that are KEY to any exercise, running or otherwise.
TIP 7: Stretch! When you're done, it is SO important to stretch. There are hundreds of great stretching resources out there for runners, so take the extra 5 minutes and stretch it out. I know if I don't stretch after a run my legs are NOT happy with me the next time I head out.
TIP 8: HYDRATE. Drink lots of water both before and after your run, especially if you are running in hot summer months. Your body needs fluids to function and your run will be greatly affected if you are dehydrated.
Running can be really hard, but with these tips, I've found my running experience to improve and I feel really good after almost all of my runs.
What are you tips/tricks for getting a great run in?
Friday, 20 June 2014
This Little Trick Will Change Your Morning Coffee
I love coffee. In fact, I love coffee a lot, probably more than I should. I need it to start my day, keep me going in the midday and if I could (and it wouldn't keep me awake at night) I would drink it after dinner.
A while back I discovered somewhere (I think I read it online, or maybe I remember it from a Sex and the City episode) to add cinnamon to your coffee. So I started doing it, thinking "yea, ok, what is this really going to do?"
FACT: It is awesome! It adds a certain (but very subtle) woodiness flavour to your coffee and it smells AH-MAZING. The change to your morning is two-fold: The aroma is calming and delicious and the taste is different, but not so much that it will throw the balance of your coffee off. This is the only way I make my coffee at home now, I highly recommend it!
HOW TO:
 1. Put your grounds in to your coffee maker as per normal
2. Sprinkle cinnamon on top of the grounds - this insures the cinnamon is blended into the flavour
3. Brew as normal - I like to set mine up to brew before I wake up, so the scent wafts up to my bedroom and I can smell is as I wake up :)
4. Add milk & sugar (or nothing at all) to your coffee as normal & enjoy!
Let me know if you try this out & what you think! I promise, it is worth it!
A while back I discovered somewhere (I think I read it online, or maybe I remember it from a Sex and the City episode) to add cinnamon to your coffee. So I started doing it, thinking "yea, ok, what is this really going to do?"
FACT: It is awesome! It adds a certain (but very subtle) woodiness flavour to your coffee and it smells AH-MAZING. The change to your morning is two-fold: The aroma is calming and delicious and the taste is different, but not so much that it will throw the balance of your coffee off. This is the only way I make my coffee at home now, I highly recommend it!
HOW TO:
2. Sprinkle cinnamon on top of the grounds - this insures the cinnamon is blended into the flavour
3. Brew as normal - I like to set mine up to brew before I wake up, so the scent wafts up to my bedroom and I can smell is as I wake up :)
4. Add milk & sugar (or nothing at all) to your coffee as normal & enjoy!
Let me know if you try this out & what you think! I promise, it is worth it!
Tuesday, 17 June 2014
Awesome Snacking with PROTINIS(TM) {Sponsored Post}

PROTINIS™ are made with oven roasted chicken & dried fruit to make up a snack that is complete source of protein. As you may or may not know, protein is pretty important stuff. Not only does it provide you with essential amino acids that your body cannot produce on its own it also helps your muscles rebuild after a workout. Complete protein also helps keep you fuller, longer. That means the more satiated you are, the less like you are to binge snack on unhealthy options.
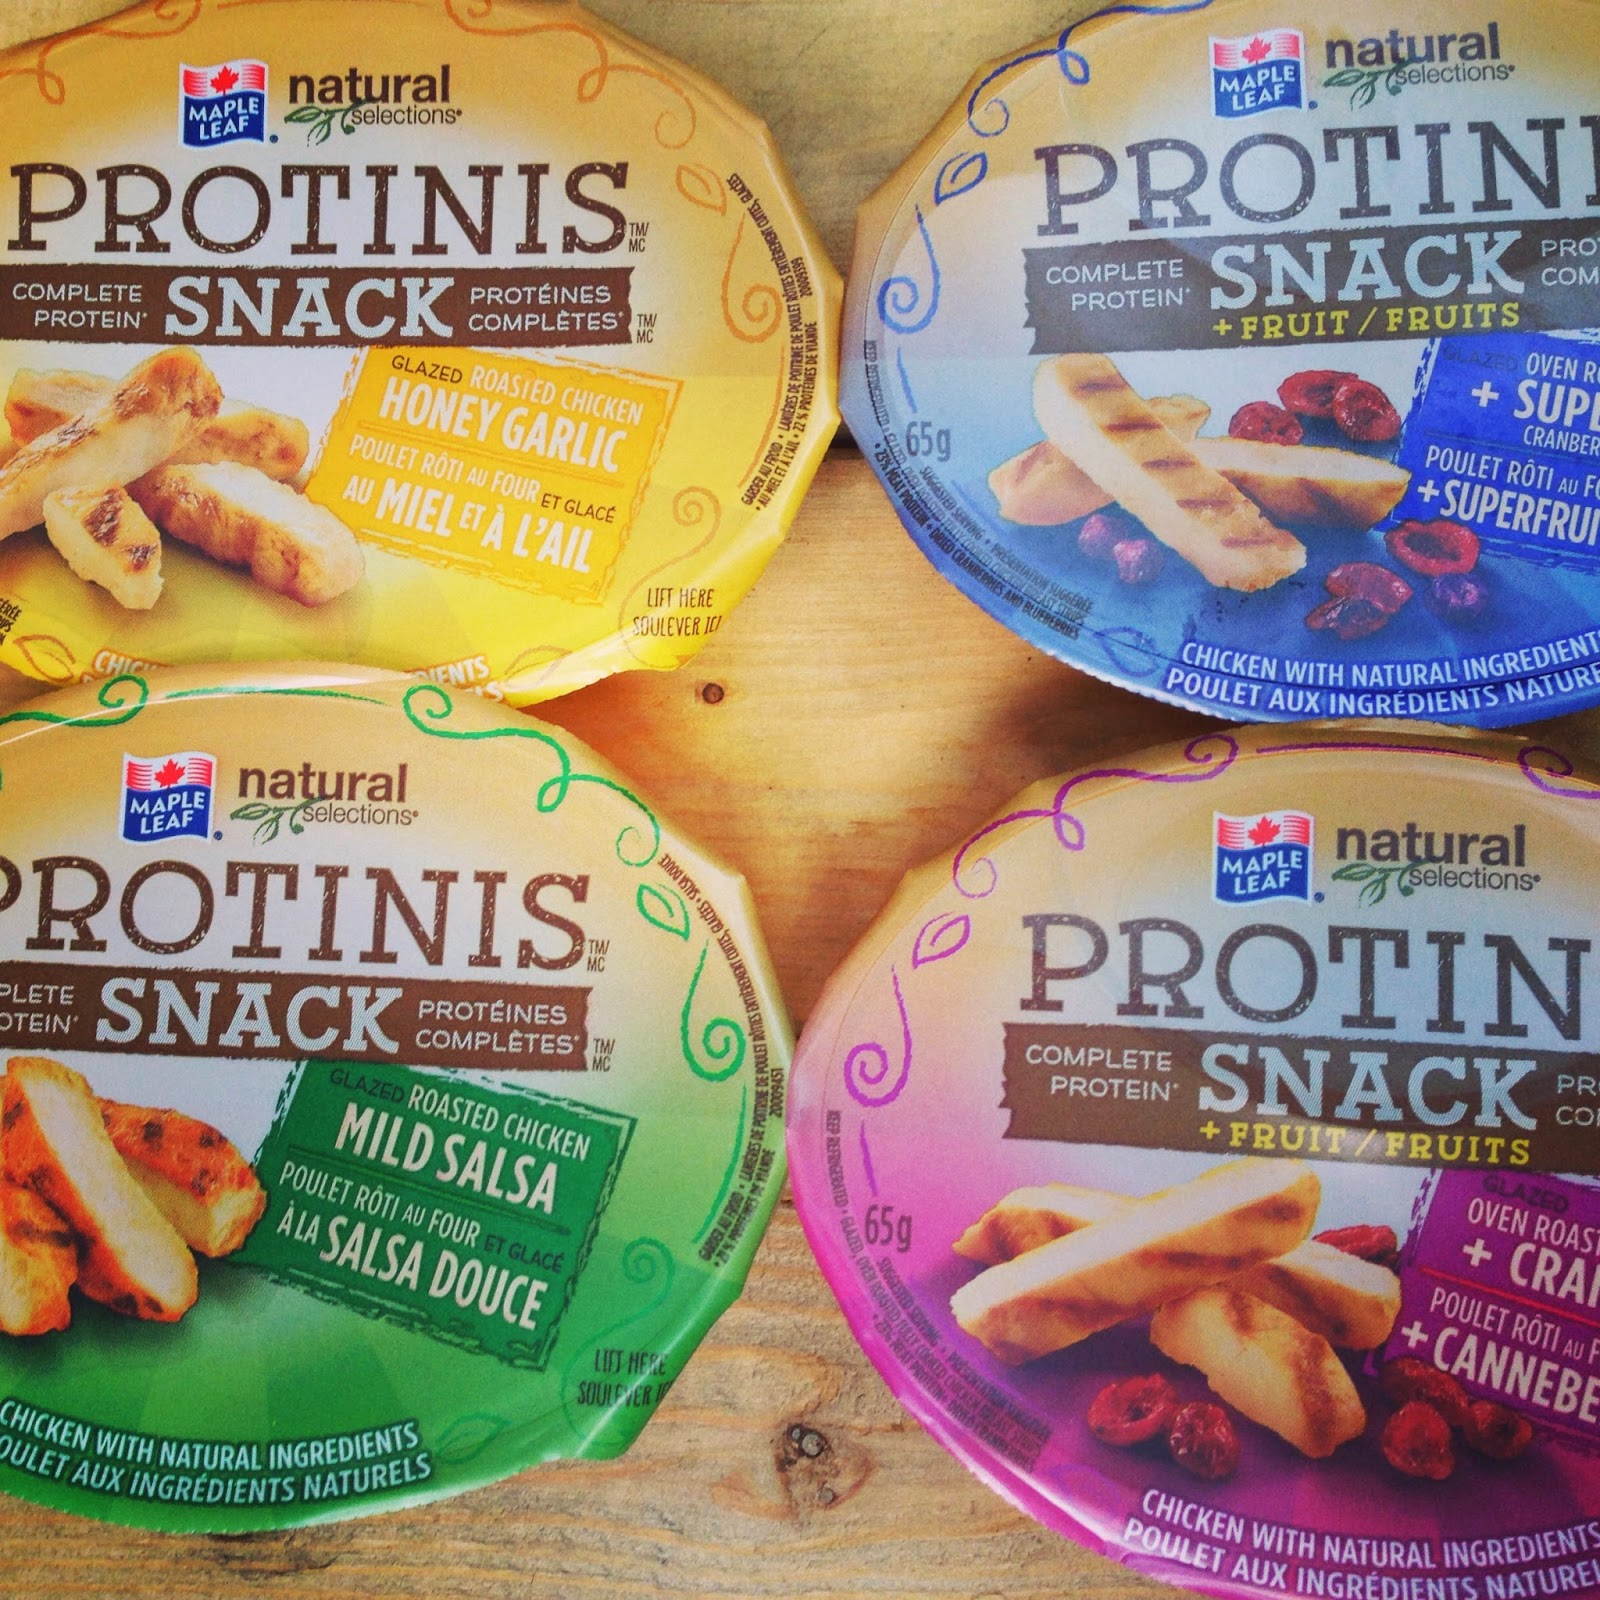 |
| SUPER LOVE these ones! |
I think this commercial sums PROTINIS™ up perfectly:
Hey, you don't have to take my word for it, either! The LOVELY folks at Maple Leaf Foods® have given me coupons to send to 6 of you! All you have to do is fill out the Rafflecopter below!
 |
| Chicken & Cranberry |
a Rafflecopter giveaway
{This is a sponsored post. However, all opinions are my own. As you know, I would never share anything with you unless I love the product and think that you will too!}
Tuesday, 10 June 2014
Flourless Chocolate Peanut Butter Mini Blender Muffins

I can honestly say, I've never, EVER considered mixing something up for baking in a blender. Maybe that's because my blender is absolute crap or maybe because my brain doesn't think outside the "bowl" (see what I did there? Like "outside the box" but BOWL, because, well, you get it). Either way, this way of preparing is amazing. Little to no mess, everything is contained and it makes for a very rich and velvety texture.
These mini muffins are amazing. There is NO refined flour, sugar, butter (the banana acts as the butter) or any dairy for that matter. That means they are gluten & dairy free. The best part? They taste like the most decadent dessert. They are actually so rich, you'll probably only need to eat just one to satisfy your chocolate craving (whether at breakfast or after dinner). Also, I love that no special ingredients are required...you'll probably have everything you need, already at home!
I highly recommend you try out this recipe!

[On a side note, I've started training for my next half marathon (Scotiabank Toronto Waterfront Marathon) that takes place on October! I'll be posting about my training over the next coming months so if you have any questions about it, shoot me an email (runningtobake@gmail.com), I'd love to answer it in my upcoming posts!]
Flourless Chocolate Peanut Butter Mini Blender Muffins
from Averie Cooks
makes about 16 mini muffins
Ingredients:
1 medium/large ripe banana, peeled
1 large egg
1/2 cup heaping with creamy peanut butter (best to go with regular peanut butter, not natural for this one)
1/3 cup cocoa powder
1/3 cup cocoa powder
3 tbsp honey (maple syrup would work as well)
1 tbsp vanilla extract
1/4 tsp baking soda
pinch of salt
1/2 cup semi-sweet chocolate chips + more for sprinkling
Method:
Preheat oven to 400 degrees F. Spray 2 mini muffin pans with non-stick spray or line with mini muffin wrappers.
In a blender (or food processor, or with a hand blender) combine banana, egg, peanut butter, cocoa powder, honey, vanilla, baking soda and salt and blend until creamy and smooth. Takes about 1 minute or so. Since my blender is not the best, I had to stop and mix with a wooden spoon once or twice to make sure everything combined properly.
Remove blender from stand and stir in the 1/2 cup of chocolate chips with a wooden spoon. Mini ones would probably work best, but I only had regular size on hand and they were fine.
Using a tablespoon, spoon mixture into muffin tins, filling up about 3/4 of the way. Sprinkle a few chocolate chips on top of the muffins and press in lightly with your finger tips.
Put in oven and bake for 8-12 minutes. The baking time really depends on your oven, the ripeness of the banana and size of the tins (I have 2 different sizes of "mini" muffin tins). Mine took about 12 minutes to cook, just make sure you watch them. They're ready when the tops are springy to the touch and a tooth pick is inserted and comes out clean.
Allow to cool in the tins for 15 minutes (if you can!) then transfer to a wire rack. You may need to loosen the edges with a knife in order for them to pop out cleanly.
Store up to 5 days in an airtight container or 6 months in the freezer (HA! Like they'll last that long).

Enjoy! These are truly delicious!

Friday, 30 May 2014
Things I Learned this Week: Life Hacks
It's BACK! I've missed a couple of weeks due to some unfortunate craziness, but TILTW is back!
Today's "Things I Learned this Week" is brought to you by Life Hacks!
1. Bacon, because..Bacon.

2. In case of power outage...
 3.Birthday Party season is upon us!
 4. I always end up with dressing in my lunch bag when I bring a salad. Voila, leak no more!
 5. I am the WORST with names...I'll have to remember this.

And a BONUS hack, in honour of my beautiful friend getting married tomorrow. I have no doubt ALL of these will be played at the reception tomorrow, and I CAN'T WAIT!

[Disclaimer: All hacks were found on Pinterest]
Today's "Things I Learned this Week" is brought to you by Life Hacks!
1. Bacon, because..Bacon.
2. In case of power outage...
And a BONUS hack, in honour of my beautiful friend getting married tomorrow. I have no doubt ALL of these will be played at the reception tomorrow, and I CAN'T WAIT!
Thursday, 29 May 2014
Granola Chocolate Chip Cookies {+ Giveaway!}

Immediately, I was intrigued. Their company mission statement is all about quality product and natural ingredients. I brought them to work for a snack and fell in love. So much so that I reached out to them and asked to to a review and giveaway for them so that I could share my new-found addiction with you!
These wonderful people sent me an entire BOX full of their fantastic product for me to try that included various nuts, snack mixes and granola. When I looked at the ingredients, I was truly surprised to see that I could pronounce everything included in their product and that I knew what all the ingredients were (coconut, olive oil, rosemary, sea salt to name a few). The best part - everything tasted amazing. There wasn't ONE thing that I didn't like. The flavours blend together so nicely, yet, sometimes they can be surprising (like their Savoury Cashew Crunch).
Needless to say, I was inspired to make something using their product & opted for somethinga little different. Enter, Chocolate Chip Granola Cookies. These cookies are to DIE for. Soft and chewy, with a nice granola crunch. Absolutely fab & super easy to put together!
Granola Chocolate Chip Cookies
inspired by epicurious
makes about 16-18 cookies
Ingredients:
Ingredients:
1 cup all purpose flour
1/2 tsp baking soda
1/2 tsp salt
1/2 cup butter, softened
1/3 cup light brown sugar
1/3 cup granulated sugar
1/2 tsp vanilla
1 large egg
3/4 cup semi-sweet chocolate chips
Method:
Preheat oven to 375 degrees F. Line 2 cookie sheets with silicone mats or parchment paper.
In a small bowl, whisk together the flour, baking soda & salt. In a stand mixer (or using a hand mixer) beat together the butter and 2 sugars together until nice and fluffy (about 2 mins). Add the vanilla and egg and beat until combined.
On slow speed, slowly add in the flour mixture until JUST combined. Using a wooden spoon, stir in the granola and chocolate chips until evenly distributed in the the dough.
Using a tablespoon, scoop out dough and transfer to the cookie sheet (use another tablespoon to release dough onto the pan). Press down with your fingers to flatten cookies slightly.
Transfer to the oven and bake for about 12 minutes or until a light golden brown. Remove from oven and transfer to cooling rack. Enjoy with a LARGE glass of milk!

Guess what?! The wonderful people at NaturSource are giving one of my readers an AMAZING Prize Pack of a variety of their products. To enter, simply fill out the Rafflecopter below!

a Rafflecopter giveaway
The Fine Print: Giveaway ends Friday June 13, 2014 at 10am EST. As I mentioned above, I did receive a basket of goodies from the people at NaturSource in exchange for a review, but all of the opinions expressed are my own.
Thursday, 22 May 2014

Friday, 16 May 2014
I'm STILL HERE!
Hello lovely people! I'm sorry I haven't been posting more often, we've had QUITE the week at the RTB household. Between sickness, my FIL in the hospital and work, we pretty much haven't stopped running around/sleeping.
In any case, next week I'll be back on the horse (which I got to do a couple of weekends ago and it was AWESOMEEE) and posting again. I actually have a couple of REALLY awesome Sponsored Posts coming up (which means another giveawayyyyy) as well as fun recipes and my usual nonsense.
Until then, have an AMAZING long weekend <3
Friday, 2 May 2014
Things I've Learned this Week 05.02.14
It's Maaaaaaaaay. I couldn't be happier! This is going to be SUCH a great month! I have a girls weekend this weekend with my Mom and Sister, next weekend is the Sporting Life 10K (which I'm totally nervous for, but it'll be great, I'm sure!), and after that is the LOOOONG weekend. Finally, I'll be going to the Falls for my sweet friend's Bachelorette and then to her wedding the following weekend!!!!!!!!!!!!!!! SQUEEEEEE! Throw in my Birthday in there and and whole lot of action going on at work...this is going to be a mental month.
Anyway, that all aside, here are the 5 things I learned on the interwebs this week!
HOW TO SOFTEN BUTTER QUICKLY
This is awesome because I'm always baking last minute and I never remember to take the butter out to allow it to come to room temperature. I'll usually zap it in the microwave, but a little part of it always ends up melting. So, from the darling at Lil' Luna, I learned that all you have to do, is cut it up into slices, set it aside while you're getting your other ingredients together and it will quickly adjust to room tempurature!

HOW DOGS REALLY DRINK WATER
This is SOOOOOO cool, you just have to go and watch it for yourself!

HOW TO EASILY REMOVE A STRAWBERRY STEM
It's almost Strawberry season (one of my FAVE fruits) so this tip will come in handy VERY soon!

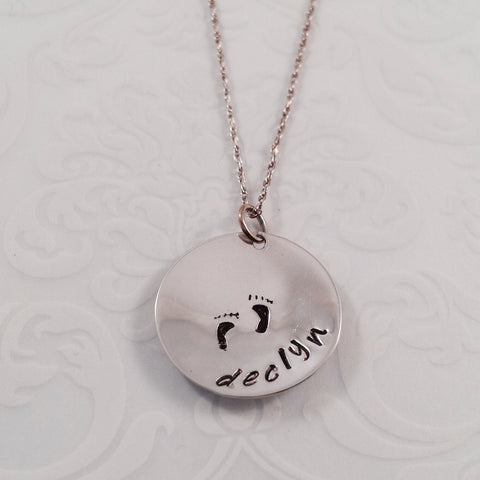
I NEED THIS NECKLACE
How absolutely adorable is this necklace? I definitely need this in my collection!

HOW TO MAKE MARY KAT SATIN HANDS
So, a looong time ago, but Mom used to be a rep for Mary Kay. My favourite product from them was always their Satin Hands product. I just LOOOVED how it smelled and how my hands felt after using it. I haven't used it for years, but I saw this online and pretty much freaked out. All you need is 1 bottle of Dawn Olay Beauty Hand renewal soap Lots of sugar and 1-2 tablespoons Coconut oil (optional. I cannot WAIT to try making this!
 Have a great weekend everyoneeeeeeeeeeee! <3
Anyway, that all aside, here are the 5 things I learned on the interwebs this week!
HOW TO SOFTEN BUTTER QUICKLY
This is awesome because I'm always baking last minute and I never remember to take the butter out to allow it to come to room temperature. I'll usually zap it in the microwave, but a little part of it always ends up melting. So, from the darling at Lil' Luna, I learned that all you have to do, is cut it up into slices, set it aside while you're getting your other ingredients together and it will quickly adjust to room tempurature!
HOW DOGS REALLY DRINK WATER
This is SOOOOOO cool, you just have to go and watch it for yourself!
HOW TO EASILY REMOVE A STRAWBERRY STEM
It's almost Strawberry season (one of my FAVE fruits) so this tip will come in handy VERY soon!
I NEED THIS NECKLACE
How absolutely adorable is this necklace? I definitely need this in my collection!
HOW TO MAKE MARY KAT SATIN HANDS
So, a looong time ago, but Mom used to be a rep for Mary Kay. My favourite product from them was always their Satin Hands product. I just LOOOVED how it smelled and how my hands felt after using it. I haven't used it for years, but I saw this online and pretty much freaked out. All you need is 1 bottle of Dawn Olay Beauty Hand renewal soap Lots of sugar and 1-2 tablespoons Coconut oil (optional. I cannot WAIT to try making this!
Subscribe to:
Posts (Atom)